The Visitor Form addon is useful when you want to generate leads or display content directly inside the chatbot window. It allows you to collect user information before or during a chat session, or show customized content such as messages, links, or forms within the chat interface.
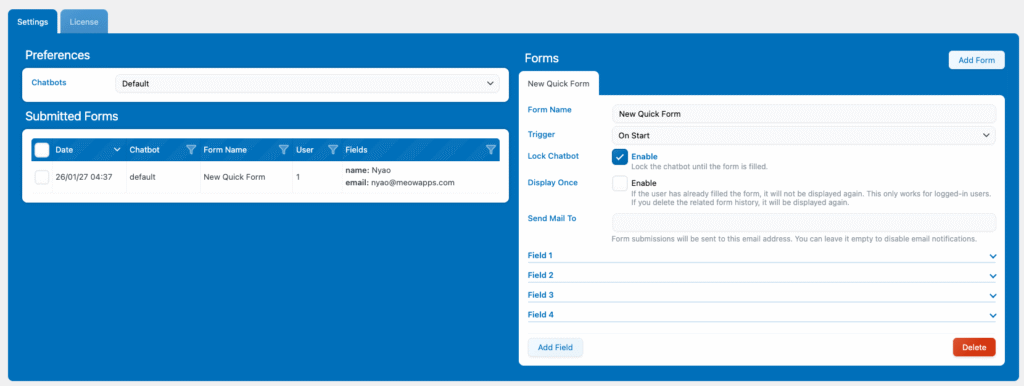
For each of your chatbots, you can create different forms with their own custom fields. When a form is submitted, all submissions are displayed in the addon dashboard for easy review.
You can also choose to receive the submissions by email, so you’re instantly notified whenever a user fills out a form.
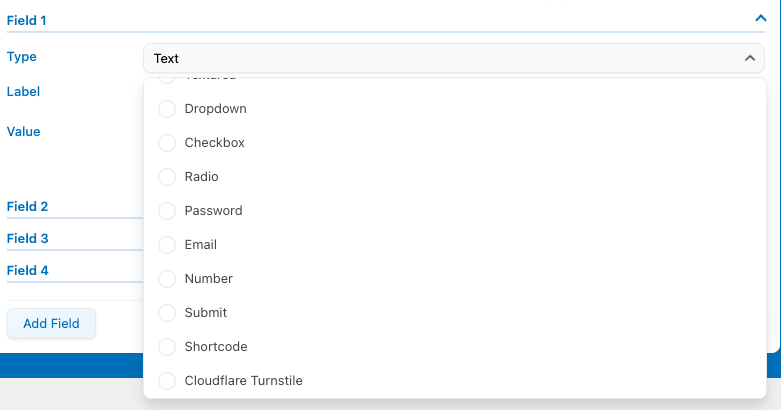
There’s a wide range of input field types you can choose from, including standard fields like text, input, email, and textarea, as well as more advanced options such as:
- Shortcode: Renders any plugin shortcode into HTML and inserts it in the form. Use this with caution, as some shortcodes may generate broken or incompatible code.
- Cloudflare Turnstile: Adds a captcha to your form to prevent bots and untrusted users from accessing your chatbot.
- Reference: Tracks URL parameters so you can identify if your chatbot is being accessed from a specific redirect or campaign.
Form Display
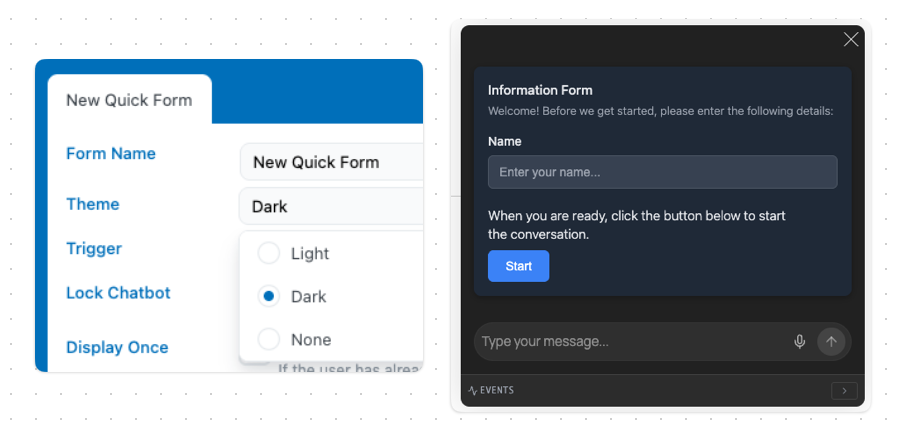
You can use predefined themes available in your form settings directly, which have two options to fit most: dark and light.
Triggers
The different events that trigger the forms to appear in the chat:
- On Start: The form is displayed as soon as the chatbot is opened.
- On Message Count: Choose how many user messages should be sent before the form is displayed.
- On Keywords: Define a list of keywords. If any of them are detected in a user’s message, the form will be displayed.
- Function Calling: Let the AI trigger the form itself by calling a custom tool.
For Developpers
When the form is submitted, it triggers a WordPress action hook that you can use to run your own custom process with the submitted data.
Here’s a simple example showing how to use that hook to save a phone number from a form submission as user meta:
add_action( 'mwai_visitor_form_process', function( $sanitized_data, $botId, $formName, $formId, $formUID, $chatId ) {
    // Check if phone number exists in the form data
    if ( isset( $sanitized_data['phone'] ) && ! empty( $sanitized_data['phone'] ) ) {
        // Get the current user ID (adjust if you need a different user)
        $user_id = get_current_user_id();

        if ( $user_id ) {
            // Save the phone number as user meta
            update_user_meta( $user_id, 'phone_number', $sanitized_data['phone'] );
        }
    }
}, 10, 7 );
Customize Mail
There are five filters to send_form_submission_email, all passing $form_data, $form, and $botId as context:
mwaivform_email_to: customize recipient(s)mwaivform_email_subjec: customize subjectmwaivform_email_body: customize bodymwaivform_email_headers: customize headers (add From, Reply-To, HTML content type)mwaivform_email_send: returnfalseto skip sending entirely
Here is an example on how to change the subject:
add_filter( 'mwaivform_email_subject', function ( $subject, $form_data, $form, $botId ) {
  $name = $form_data['name'] ?? 'visitor';
  return sprintf( 'New message from %s', $name );
}, 10, 4 );
The $form_data array passed to the email filters contains the visitor’s submitted answers plus some internal metadata added automatically when the submission is saved.
Each visitor field appears as a key/value pair, where the key is the slugified field label (e.g. a “Full Name” field becomes full_name) and the value is what the visitor entered (a string, or an array for multi-value fields like checkboxes).
In addition, the array always includes these reserved metadata keys: user_id (the WordPress user ID, or "Guest" for anonymous visitors), submission_date (formatted as y/m/d h:i), form_name, form_id, form_uid, chat_id (the chatbot conversation ID), and bot_id (the chatbot identifier). When building a custom email, you typically display the visitor field values and skip these reserved keys.