First, you need to enable the Insights feature. Go to the Modules tab of AI Engine and enable Insights (in the Tools & Insights card):

This will add a new tab in AI Engine settings. Now you can go to the “Insights” tab. Here, you will find a list of all the queries that are being made to your chatbots and tools, with their tokens and price, and an Activity chart. Click a query to see its details, including the cached tokens (input tokens the provider billed at a lower rate). You can also enable the limits here.
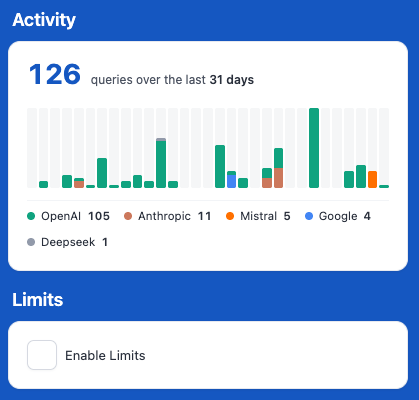
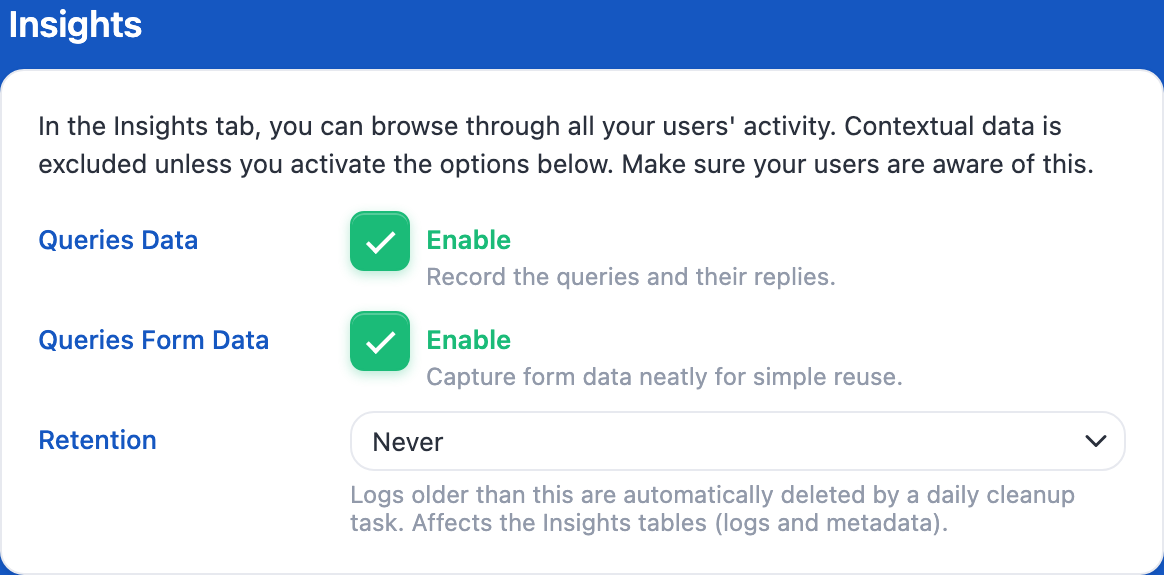
By the way, if you want to see the logs of any of these queries, you will need to go to Settings > Others and enable the “Queries Data” option in the Insights block. Retention, in the same block, sets how long the logs are kept.
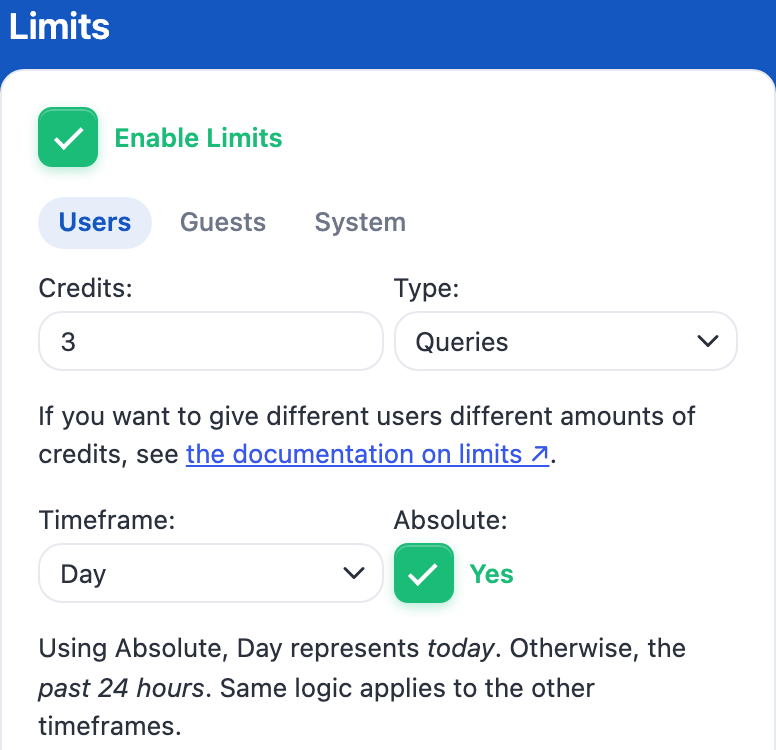
Once you have enabled the limits, you have different settings that you can tweak, such as the number and type of credits (Queries, Tokens, and Dollars). You can also set the Timeframe for each of these limits to reset. With Absolute checked, the timeframe follows the calendar (Day means today, Month means this month). Without it, it is a rolling window (Day means the past 24 hours).
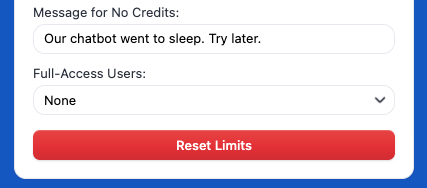
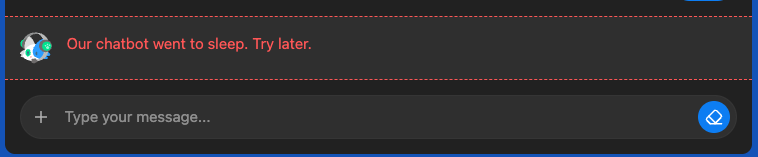
Be careful, there are three different settings tabs here: User, Guests, and System. Take a look at the message that will be sent by the chatbot when the user reaches its limit for each of those.
The “System” setting will apply to every type of user. It’s kind of like your website’s maximum limit, so make sure to set this up correctly as well.
If you want to customize the limits based on your users’ roles or any meta data, you can use the PHP Filters such as mwai_stats_credits and mwai_stats_coins. See the examples below.
How to check user’s usage
The usage is not a value you can see directly, as it’s not a meta that’s stored per user: it’s calculated on the fly whenever your user makes a query. The system compares the number of queries in the user’s history to the max credits allowed over the specified timeframe.
You can visualize that by using the following shortcodes:
[mwai_stats display="debug"]
[mwai_stats_current display="usage"]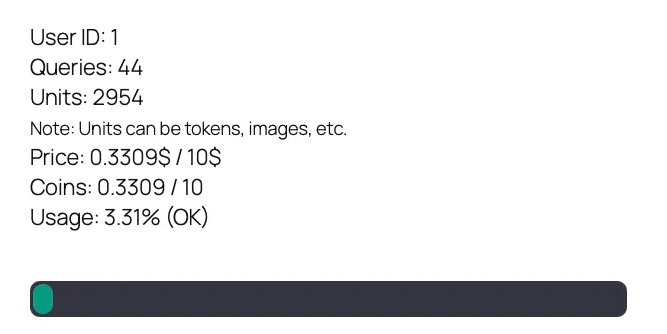
All the available parameters for the shortcode:
- display: debug, usage
- display_who: true, false
- display_queries: true, false
- display_tokens: true, false (the older display_units still works, and shows the old “Units” label)
- display_price: true, false
- display_usage: true, false
- display_coins: true, false
Non credits limitation
If you are looking for ways to block access from different parameters, such as time (only available from 2 p.m to 4 p.m), currently, there are no out-of-the-box features to accomplish this. However, you can achieve it yourself by using AI Engine filters. By using the mwai_ai_allowed($allowed, $query, $limits) function, you can check the timing of the user’s query and return an error message if the timeframe is not suitable for you.
Rather than using filters, you can completely overwrite the chatbot shortcode so that it only displays under specific conditions, such as within a certain time range, user role, or other custom logic.
To learn more about how to do this, check out this documentation: Shortcode Overwrite & Conditional Logic
This approach gives you full control over when and how the chatbot appears on your site.
You can also come up with a solution on the client side. Using JavaScript, you can check the current time and then select the chatbot using its ID to disable it. You can do this by either hiding it or disabling the input with CSS, or even deleting the DOM element.
Can I use a membership plugin?
You can define a limit on the number of credits (queries, tokens, or dollars) a user can spend over a given time frame (month, day, year). When a query is made, the plugin checks the history of queries during that period and verifies whether the number of queries, tokens, or dollars exceeds the chosen value. That’s it.
The plugin doesn’t need to know whether you’re using a third-party plugin to manage roles or access. It just needs to know the number of credits you allow to be used. This value can be dynamically adjusted using filters:
- mwai_stats_credits($credits, $userId) → modifies the number of credits (allows you to create your own system)
- mwai_stats_coins($price, $stats, $atts) → modifies the coins (lets you convert the price you personally pay to OpenAI into your own system of coins that you share with your users)
So in your case, you can use the mwai_stats_credits filter to fetch the user’s metadata and return its value. This will override the credits you set manually in the Limits settings. Then, when the plugin checks the query history over the timeframe, it will compare the number of credits (X, your WooCommerce metadata) against the credits used in recent queries.
add_filter( 'mwai_stats_credits', function ( $credits, $userId ) {
  $user = get_userdata( $userId );
  if ( !empty( $user->roles) && is_array( $user->roles ) ) {
    foreach ( $user->roles as $role) {
      if ( $role === 'premium' ) {
        return 50;
      }
      if ( $role === 'standard' ) {
        return 10;
      }
    }
  }
  // This will be basically the default value set in the plugin settings
  // for logged-in users.
  return $credits;
}, 10, 2);
Let’s assume your user has a corresponding “custom_credits” value. When a user purchases credits, you just need to add them to this number.
add_filter( 'mwai_stats_credits', function ( $credits, $userId ) {
    $user = get_userdata( $userId );
    if ( !empty( $user->custom_credits ) ) {
        $credits = $user->custom_credits;
    }

    return $credits;
}, 10, 2);
For more details on all available filters, check the PHP Filters reference.
About timeframes: there is no built-in subscription window (limits that reset on the anniversary of each user’s subscription). The timeframes are either calendar periods (Absolute) or rolling windows. If you need subscription logic, use the
mwai_stats_creditsfilter above, or themwai_ai_allowedfilter below with your own counter.
Build your own logic
You can also use the mwai_ai_allowed filter while disabling the built-in limit system to create your own custom logic for determining whether a query should be allowed.
Here are a few quick examples to get you started:
add_filter( 'mwai_ai_allowed', function( $allowed, $query, $limits ) {

    // Only apply to text queries
    if ( ! ( $query instanceof Meow_MWAI_Query_Text ) ) {
        return $allowed;
    }

    // Always allow a specific chatbot, free to use / limitless
    if (
        isset( $query->botId ) &&
        $query->botId === 'chatbot-free'
    ) {
        return true;
    }

    return $allowed;

}, 10, 3 );
add_filter( 'mwai_ai_allowed', function( $allowed, $query, $limits ) {
// Only apply to text queries
if ( ! ( $query instanceof Meow_MWAI_Query_Text ) ) {
return $allowed;
}
// If guest user, keep default behavior
if ( ! is_user_logged_in() ) {
return $allowed;
}
$user_id = get_current_user_id();
$available = (int) get_user_meta( $user_id, 'available_messages', true );
// Block if no messages left
if ( $available <= 0 ) {
return false;
}
// Decrement and save
update_user_meta( $user_id, 'available_messages', $available - 1 );
return $allowed;
}, 10, 3 );