Shortcut
A shortcut is basically a button that will be pushed by the server-side or directly in JS via the MwaiAPI (setShortcuts). Each shortcut has a type and data. When the chatbot uses Local Memory, the shortcuts and blocks of the last reply are kept, so they are still there after the visitor reloads the page.
If you don’t want to code any of this to get Shortcuts in your chatbot you can use the Quick Actions add-on!
Message
The label is displayed as a chip (a small rounded button) in the chatbot. When clicked, the message is sent to the chatbot. Its look can be changed through its variant (info, success, warning or danger) and its icon (an emoji or an image URL).
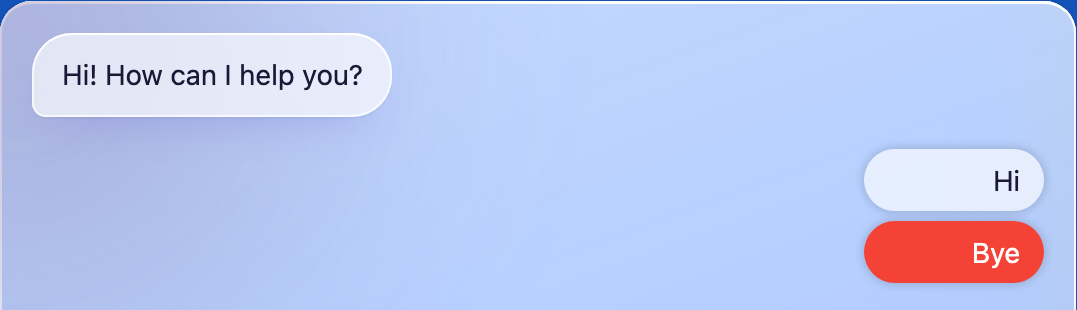
You can create these shortcuts either by using JS or PHP. This means you can create them dynamically by using the above actions as we have seen. Here are examples in both JS and PHP:
MwaiAPI.chatbots.forEach(chatbot => {
    chatbot.setShortcuts([
        {
            type: 'message',
            data: {
                label: 'Hi',
                message: 'Hello, nice to meet you, what can you do for me?',
                variant: 'info',
                icon: null
            }
        },
        {
            type: 'message',
            data: {
                label: 'Bye',
                message: 'Goodbye, see you soon!',
                variant: 'danger',
                icon: null
            }
        }
    ]);
});
add_filter("mwai_chatbot_shortcuts", function ($shortcuts, $args) {
$shortcuts[] = [
'type' => 'message',
'data' => [
'label' => 'Hi',
'message' => 'Hello, nice to meet you, what can you do for me?',
'variant' => 'info',
'icon' => null
]
];
$shortcuts[] = [
'type' => 'message',
'data' => [
'label' => 'Bye',
'message' => 'Goodbye, see you soon!',
'variant' => 'danger',
'icon' => null
]
];
return $shortcuts;
}, 10, 2);Block
It’s just some HTML code that can be pushed either by the server-side or directly in JS via the MwaiAPI (setBlocks). A block also comes with script, so you can use custom logic and lock the chatbot if you want to. For instance, it could force a user to enter some data before continuing.
If you don’t want to code any of this to get Blocks in your chatbot you can use the Visitor Form add-on!
Content
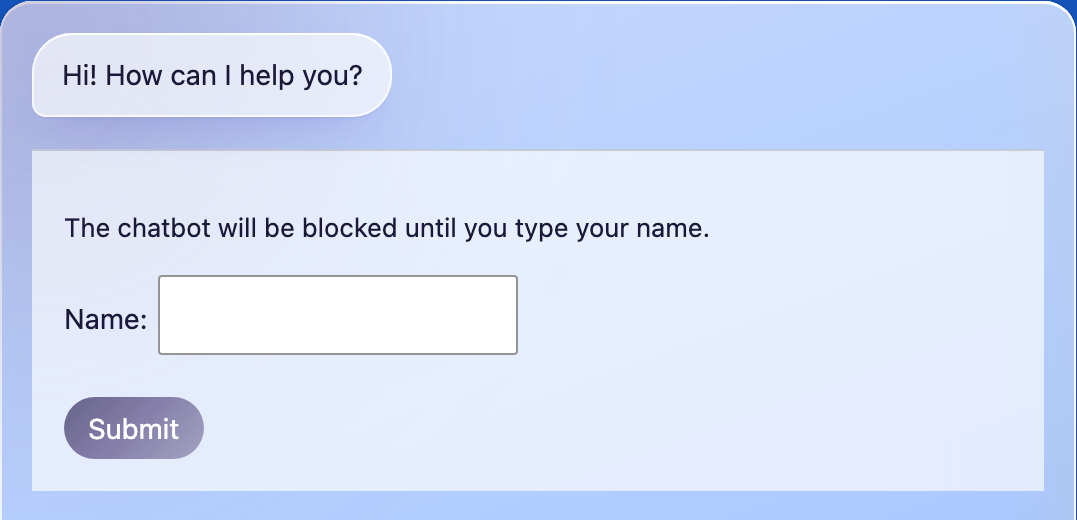
You can create these Blocks either by using JS or PHP. This means you can create them dynamically by using the above actions as we have seen. Here are examples in both JS and PHP:
MwaiAPI.getChatbot().setBlocks([
  {
    type: 'content',
    data: {
      html: `
        <p>The chatbot will be blocked until you type your name.</p>
        <form id="userForm">
          <label for="name">Name:</label>
          <input type="text" id="name" name="name" required><br><br>
          <button type="submit">Submit</button>
        </form>
      `,
      script: `
        const chatbot = MwaiAPI.getChatbot();
        chatbot.lock();
        document.getElementById('userForm').addEventListener('submit', function(event) {
          event.preventDefault();
          const name = document.getElementById('name').value;
          alert("Hi " + name + "!");
          chatbot.unlock();
        });
      `,
    }
  }
]);
add_filter("mwai_chatbot_blocks", function ($blocks, $args) {
$randomId = uniqid();
$blocks[] = [
'id' => $randomId,
'type' => 'content',
'data' => [
'html' => '<div>
<p>The chatbot will be blocked until you type your name.</p>
<form id="userForm">
<label for="name">Name:</label>
<input type="text" id="name" name="name" required><br><br>
<button type="submit">Submit</button>
</form>
</div>',
'script' => '
const chatbot = MwaiAPI.getChatbot("' . $args['botId'] . '");
chatbot.lock();
document.getElementById("userForm").addEventListener("submit", function(event) {
event.preventDefault();
const name = document.getElementById("name").value;
alert("Hi " + name + "!");
chatbot.unlock();
chatbot.removeBlockById("' . $randomId . '");
chatbot.addBlock({ type: "content", data: { html: "Thank you!" } });
});
'
]
];
return $blocks;
}, 10, 2);