AI Forms

When Should I Use AI Forms?

If you have a scenario where you need to generate a custom response based on user input, whether it’s a quiz or a decision tree, AI Forms can be a great solution.

It’s much easier than trying to train a chatbot step by step to reach a single outcome.

Barebone Example

How To Use AI Forms ?

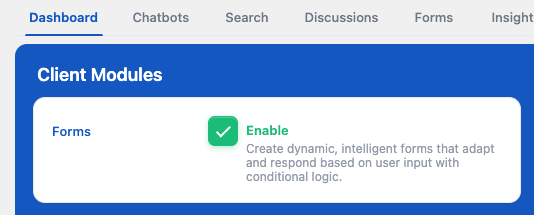
To build AI Forms, you first need to enable the Client Module “Forms”.
AI Forms are built using Gutenberg Blocks. Each component of the form is its own block with its own settings, and they can reference each other, act as parents, and create conditional logic between them.

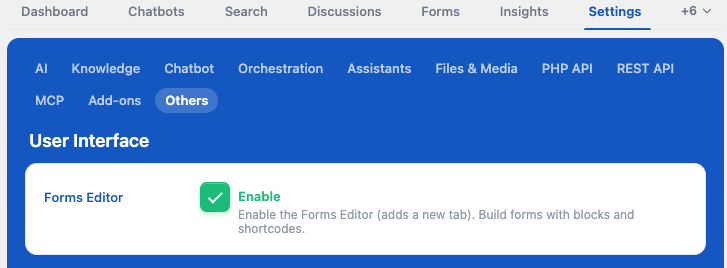
Since this relies on Gutenberg, if you’re using a third-party builder you won’t be able to create a form directly within your post. In that case, you can use the Forms tab (by enabling the Forms Editor in the plugin settings) to build forms there and then embed them in your posts using the related shortcode.
Fields Showcase

Here is a form built directly on this page so you can see all the different types of inputs you play with.

The Submit button will be disabled as long as the required field is empty.


AI Form Blocks

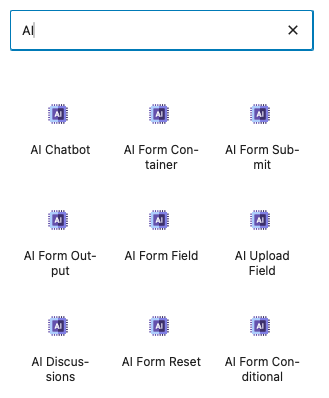
Once you have the AI Forms feature enabled, you will have access to new blocks. You can search for “AI” and find them all listed.
Form Submissions

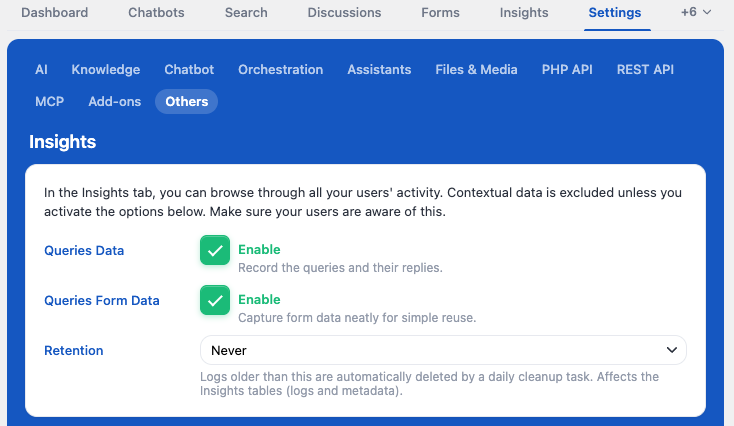
If you want to see the data submitted through your forms by your users, enable the “Queries Form Data” option to display it in the Insights tab. This will let you review exactly what information is being sent in each form submission.
If you want to receive email notifications whenever a form is submitted, instead of checking the queries manually, you can use the Notifications addon. It will automatically send you an email each time a new submission is received.

Form Structure

When creating a new form, you should start with a container. Without it, the form will appear like raw HTML without any styling.

The container also provides a pre-made template you can use to get started quickly. We will use that default template to explain how it works.
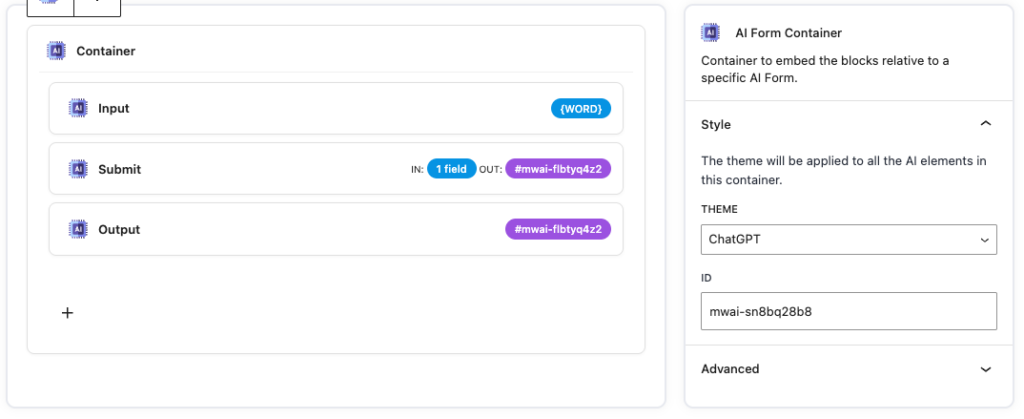
Each block has its own settings. Select a block by clicking on it, and in the right-side panel you’ll find all the available settings you can modify.

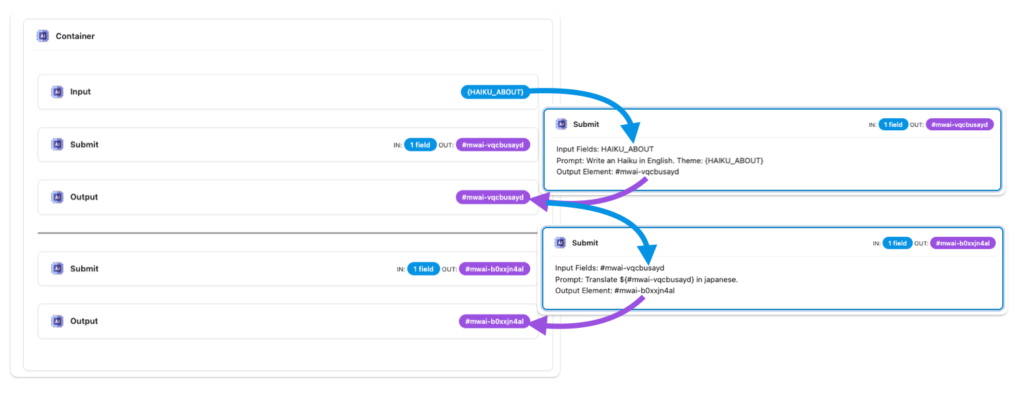
The flow should be as follows: the container holds all fields, all inputs are referenced in the submit prompt (your instructions sent to the AI), and the submit defines where the output should be written (the output field).

[ Container ]
      |
      ├── [ Input Field 1 ]
      ├── [ Input Field 2 ]
      ├── [ Input Field 3 ]
      |
      └── [ Submit Prompt ]
              |
              ├── uses → {Input Field 1}
              ├── uses → {Input Field 2}
              ├── uses → {Input Field 3}
              |
              └── sends to AI
                       |
                       ▼
                [ AI Response ]
                       |
                       ▼
                [ Output Field ]

Building a Prompt

Building an AI form prompt is done in the Submit field. You’ll find a text area where you can create your prompt template.

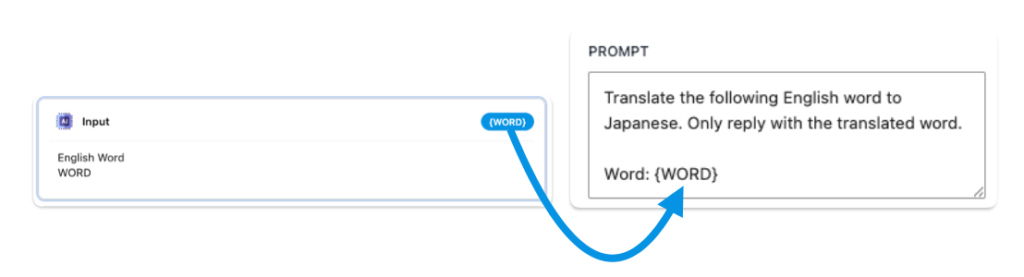
To include user inputs in the prompt, simply add the field name in curly brackets, like {WORD}. It will automatically be replaced with the user’s input.

For example, if the field WORD has the value cat, then:
Word: {WORD}Word: cat

You are not limited to your own form fields. You can also use query selectors.

For example, if you have a predefined value on your page, you can target it using ${#myfield}. This could be another form’s output, allowing you to reuse a previous result as an input in a different form.

Form Output

Each Submit field should have an output defined. In the Submit field settings, you’ll find an “Output Element” option that needs to be filled.

This field expects a query selector, which means you can display the output anywhere on your page. For now, you can simply use the AI Forms Output field as your target.

When using an Output field, you can simply copy and paste the purple ID into the Output Element of your Submit field.

Make sure you don’t forget the #, as this is a query selector, not just a field name reference.

Advanced Forms

You can also use other AI Forms blocks to create more advanced prompts and behaviors.

Model and Context Params

In the Submit block, where you define your prompt, you can also adjust the context and model parameters.

You can:

  • Choose which model to use for the prompt
  • Decide whether to use a Knowledge environment
  • Select MCP servers if needed

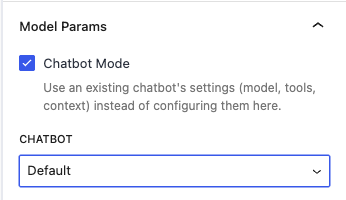
If you already have everything configured in a chatbot and want to reuse that setup, you can enable Chatbot Mode and select it. This will run the form’s final prompt through your chatbot instead of using the default parameters.
Conditionals

Conditional blocks can be used to check the value of one or multiple fields. If all conditions are met, they will display their child blocks (not only AI Forms fields, but any block inside them).

For example, you could have two conditionals checking the value of an input like “word”:

  • If the value is “cat”, you show a submit with prompt specific to that case
  • If the value is “dog”, you show a completely different submit with its own prompt as well

This way, it’s almost like having two forms in one, each with its own logic and behavior depending on the user input.
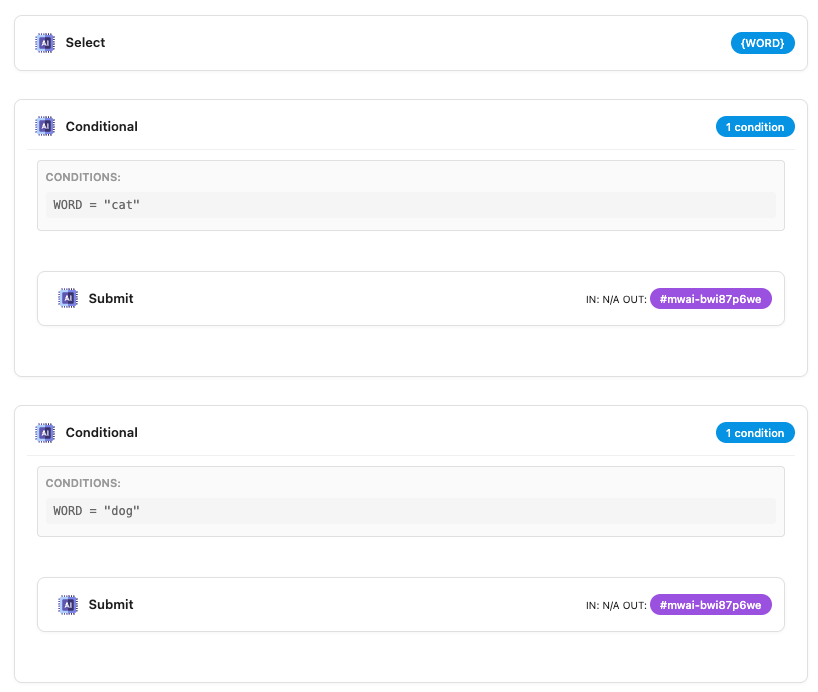
Here we use conditionals to display different Submit fields, but you can also make fields depend on other fields. For example, one input can appear only if another field has a specific value.

Filters

AI Forms also sends an event when a form is submitted, so you can create your own custom behavior based on that submission using this filter:

MwaiAPI.addFilter('ai.formReply', function (reply, args) {
  const { formId, sessionId, contextId } = args;
  return reply + ' For more information, visit [Meow Apps](https://meowapps.com).';
});

This requires some technical knowledge, but it allows you to build very specific behaviors.

For example, you can react to a form submission, check the result, and then dynamically display new fields. This could include showing another Submit block with a new prompt based on the previous output.

Here is how it is done here:
setTimeout(function () {
  const field1 = document.querySelector('#mwai-k0rq100s6');
  const field2 = document.querySelector('#mwai-b0xxjn4al');

  if (field1) field1.style.display = 'none';
  if (field2) field2.style.display = 'none';

  MwaiAPI.addFilter('ai.formReply', function (reply, args) {
    const { formId, sessionId, contextId } = args;

    if(formId != "f5a26dbe26cb08f2486ea274ea16dcaf") return reply;

    const field1 = document.querySelector('#mwai-k0rq100s6');
    const field2 = document.querySelector('#mwai-b0xxjn4al');
    const fieldToHideAfterSubmit = document.querySelector('#mwai-24mndzrb3');

    if (field1) field1.style.display = '';
    if (field2) field2.style.display = '';

    if (fieldToHideAfterSubmit) {
      fieldToHideAfterSubmit.style.display = 'none';
    }

    return reply;
  });
}, 1000);

Autofill

You can also autofill values if you already have predefined content available, such as user information.

Here is an example: when clicking the button, it automatically sets the input value based on the current page content, but it could really be anything depending on your use case.

My name is Nyao

Form fields are actually wrapped inside <fieldset> elements, not direct <input> elements themselves.

So to dynamically update the value, you first need to find the actual <input> or <textarea> inside the fieldset before modifying it.

Here’s a code example:

<span id="custom-content">My name is Nyao</span>

<button style="margin-left: 15px"id="copy-btn">Copy to input</button>

<script>
  document.getElementById('copy-btn').addEventListener('click', function() {
    var span = document.getElementById('custom-content');
    var fieldset = document.getElementById('mwai-0xl7ikx7s');

    if (!span || !fieldset) return;

    var text = span.innerText.trim();

    var input = fieldset.querySelector('textarea') || fieldset.querySelector('input[type="text"]') || fieldset.querySelector('input');

    if (!input) { alert('No input found inside fieldset'); return; }

    input.focus();
    input.value = text;
    input.dispatchEvent(new Event('input', { bubbles: true }));
    input.dispatchEvent(new Event('change', { bubbles: true }));
  });
</script>

Voice

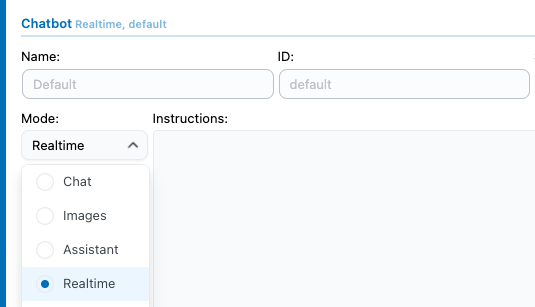
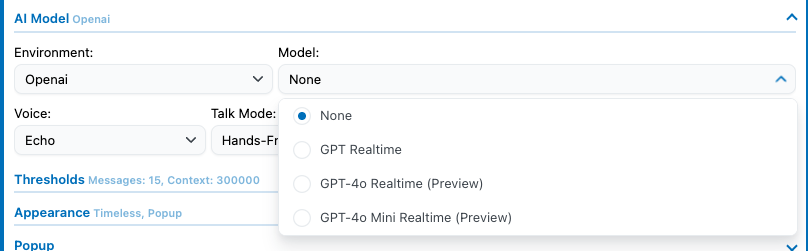
You can set your chatbot mode to Realtime to use OpenAI’s voice-to-voice models, which support both voice input and voice output.

Make sure to have an OpenAI Environment selected as well as a realtime model; if both are not selected properly, the chatbot won’t be able to work.

Text To Speech

With the regular chatbot, text-to-speech is not supported natively by AI Engine, but some freelancers have developed AI Engine addons that handle this functionality.

Speech To Text

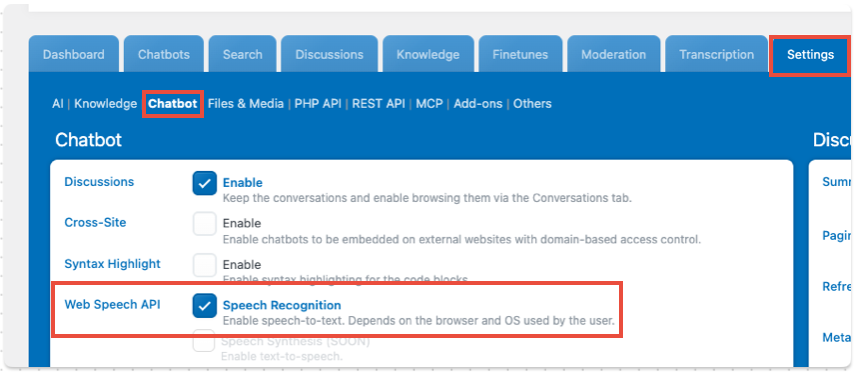
A regular chatbot can support voice input to write messages instead of typing. Note that this does not rely on any AI transcription model, nor is this a feature of the plugin itself. This uses your web browser’s built-in Web Speech API, so the result and the supported languages you get from it depend on your current device.

Correct the typos and grammar mistakes in this text without altering its content. Ensure the reply is in the same language as the original text.

Ensure the reply is in the same language as the original text (en_us, English).

You can enable this by going to Settings > Chatbot > Web Speech API.

This will add a microphone icon in the message input section of your chatbot:

File Upload (PDF, PNG…)

Upload PDFs, DOCx, and more

If you want your users to be able to upload PDF files, you have 2 choices:

  • Use an OpenAI Assistant — Learn how to use Assistants. In AI Engine, you can enable the File Search option in your chatbot settings, which allows the assistant to accept files for discussion threads.

The Assistants are getting deprecated by OpenAI, so this will no longer be supported. Use a regular chatbot with File Upload instead.

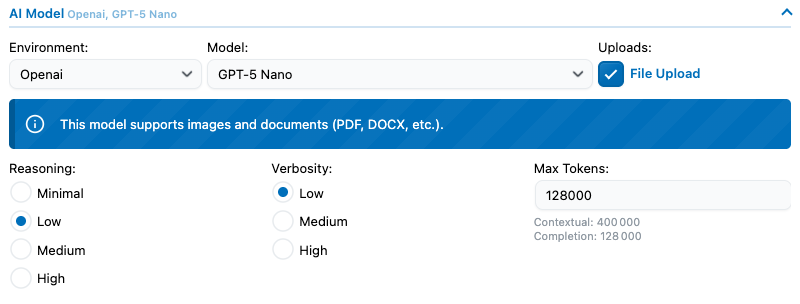
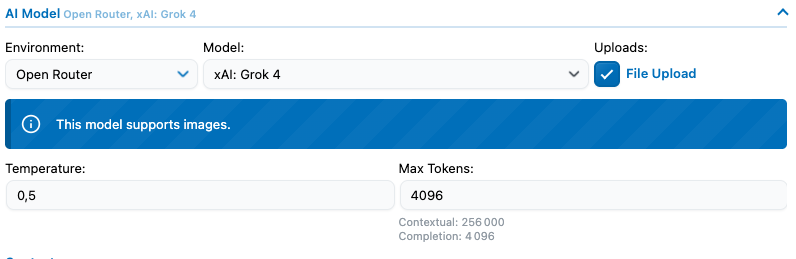
  • Use a File Compatible Model – Most models are now able to handle file upload directly. If the model you have selected is compatible, you can tick the “File Upload” option.

Upload Images

This is now the same process as File Upload. If the model is only compatible with images, you will get the following message.

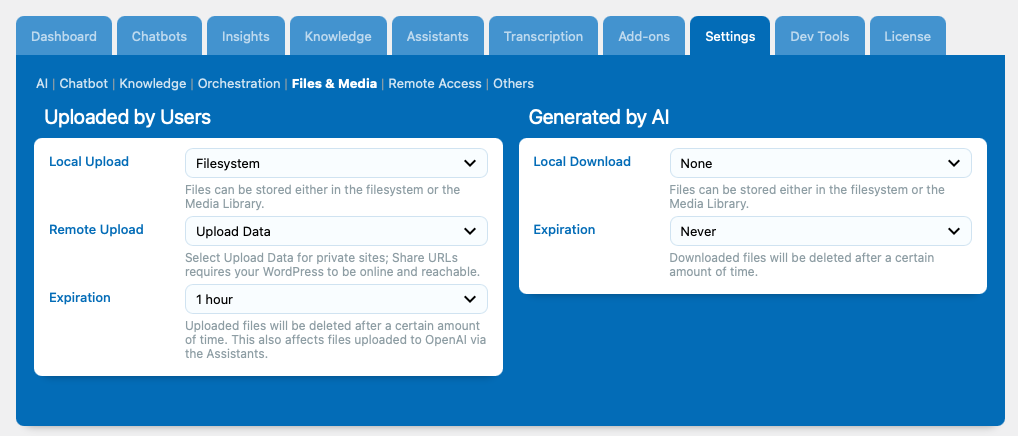
Uploaded media have to be stored on your WordPress server first so they can be sent through in the chatbot query. As for replies, if they contain a file or an image, that file also needs to be saved on your server so your users can download it.

You can go to Settings > Files and Media to modify how these files should be handled on your server.

Upload multiple files

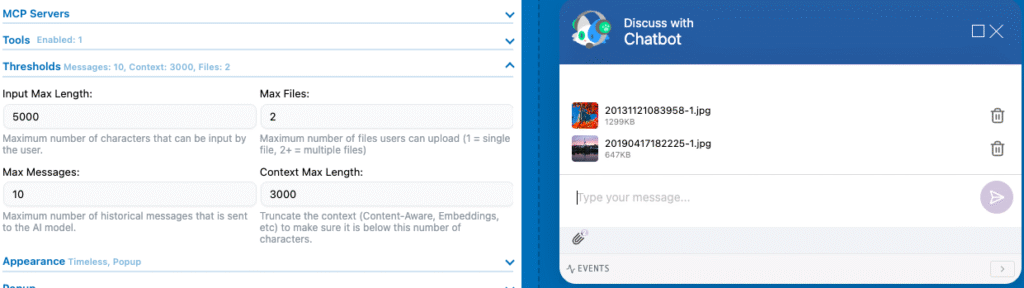
Not all models are compatible with multi-file upload. If not, you will probably get an error if you try to send multiple files in a single query. Go to your chatbot settings, and under the threshold section, you can select the maximum number of files that can be uploaded per message.

Knowledge (Embeddings)

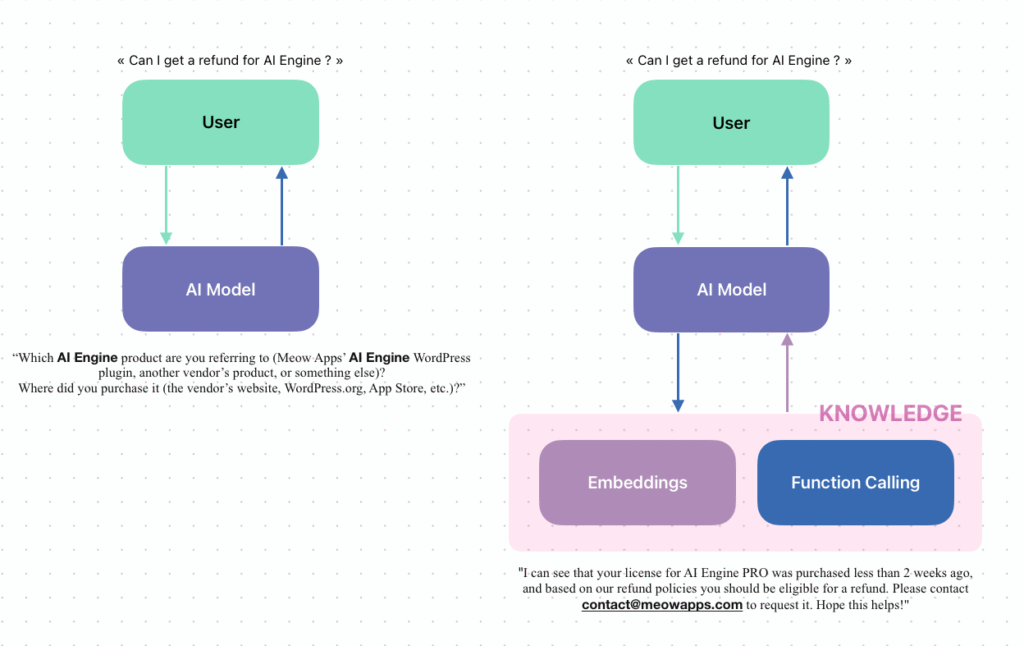
If you need your chatbot to rely on specific information and not only on its general AI training, AI Engine can help you build a knowledge base for tailored responses. Please read this documentation to get started: Knowledge Base.

Create & Edit Images

Chatbot

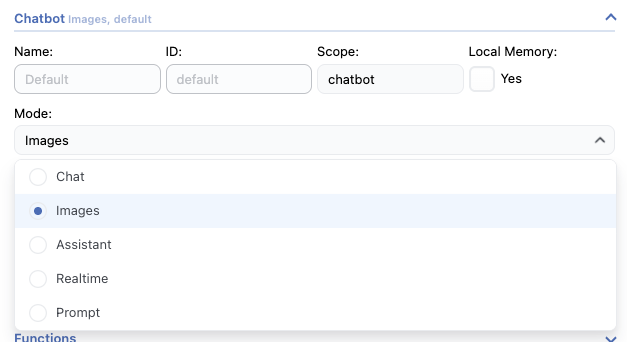
You can choose to set your chatbot to “image” mode and it will generate images for each message you send.

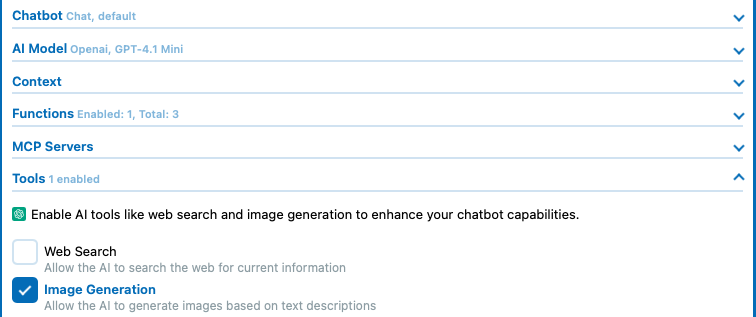
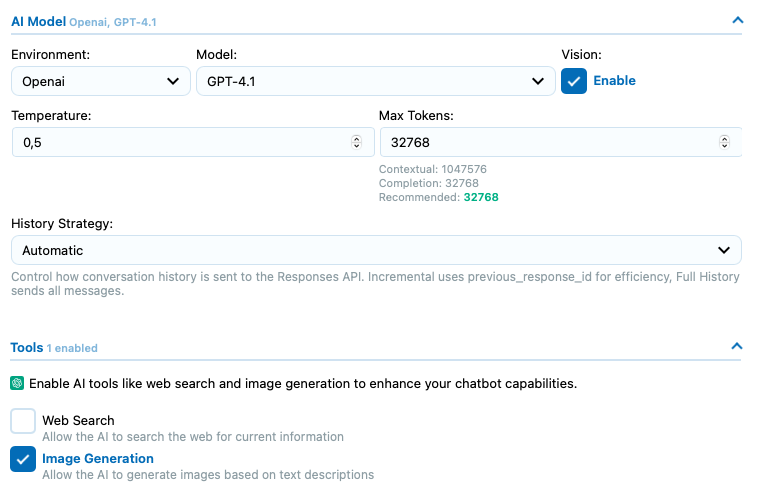
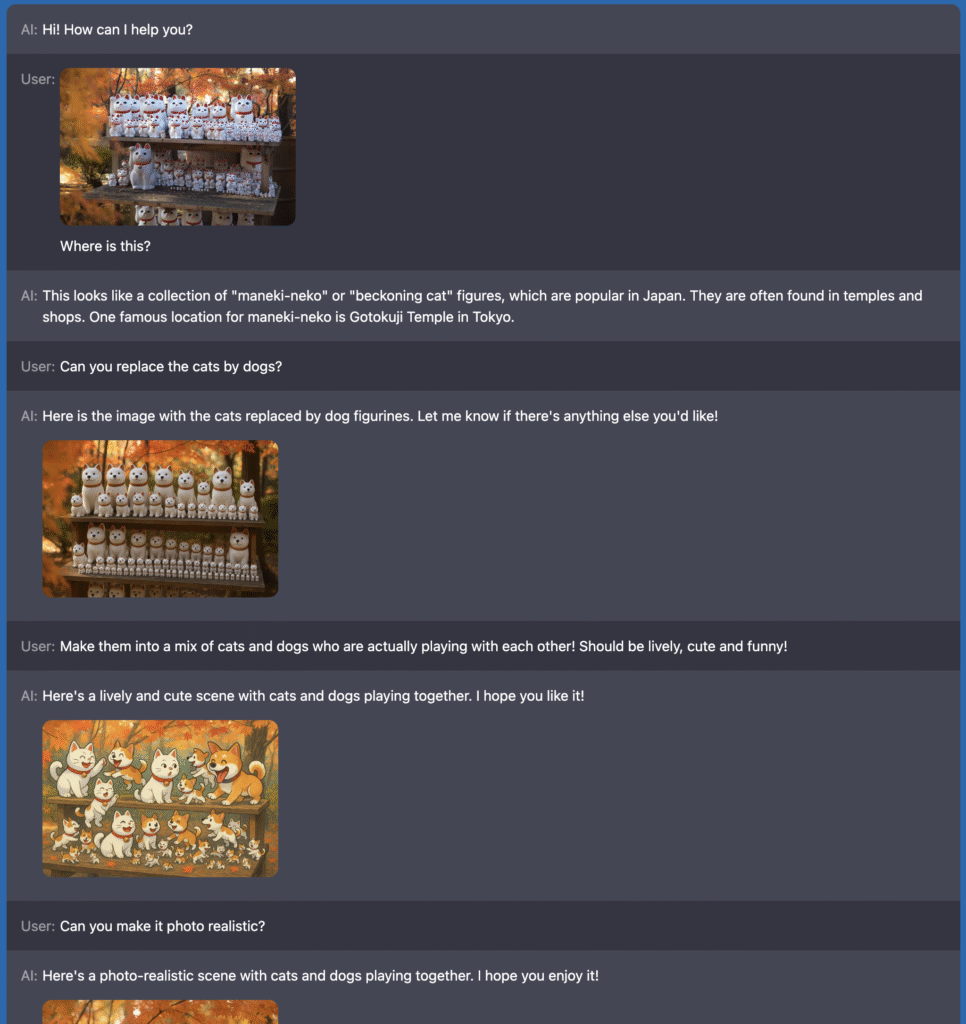
If you want your chatbot to work with text responses and generate images only when asked, the recommended method is to use the Chat Mode with Image Generation tool, compatible with most recent models.

If your model is compatible, you can simply select it and it will be used automatically, just like function calling. This approach runs entirely on OpenAI’s side ( or Google / Anthropic ), so you won’t have any control over it, there are no settings to customize or tweak the results. However, it’s a free and straightforward solution.


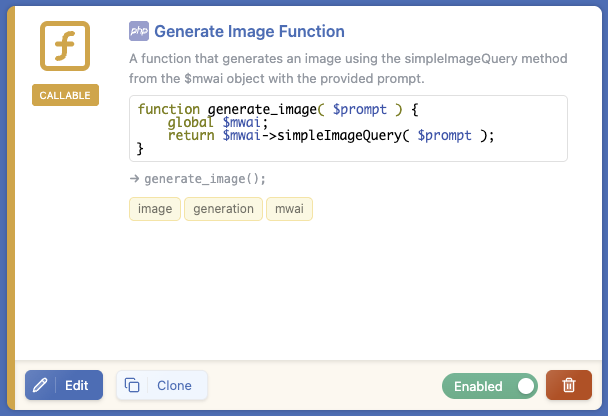
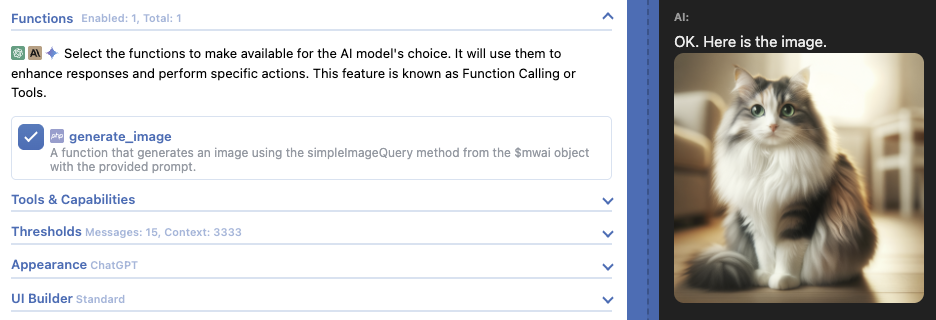
If you are using a model that cannot run the out-of-the-box Image Generation tool, you can also use function calling to let the chatbot generate the image by itself by creating your own logic.

Yes, it is really just two lines of code, and now any chatbot can generate images:

function generate_image( $prompt ) {
    global $mwai;
    return $mwai->simpleImageQuery( $prompt );
}

AI Forms

If you need to tailor your users’ prompts with predefined choices, using AI Forms might be the best solution. You can learn everything about them in this documentation: Your First Form.

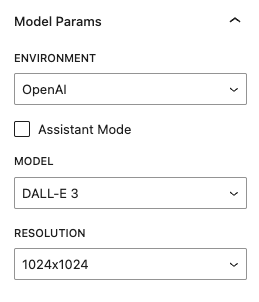
To generate Images with forms you just need to select a model that generates images instead of a regular text-based model:

You can try it yourself below: the prompt is already predefined; it should generate something that looks familiar…

Dashboard

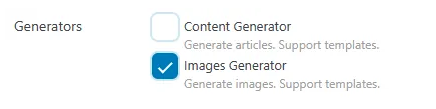
First, in the AI Engine dashboard, make sure to enable the Images Generator feature.

This will add a new button that will bring you to the image generation dashboard in the top right corner of the AI Engine dashboard.

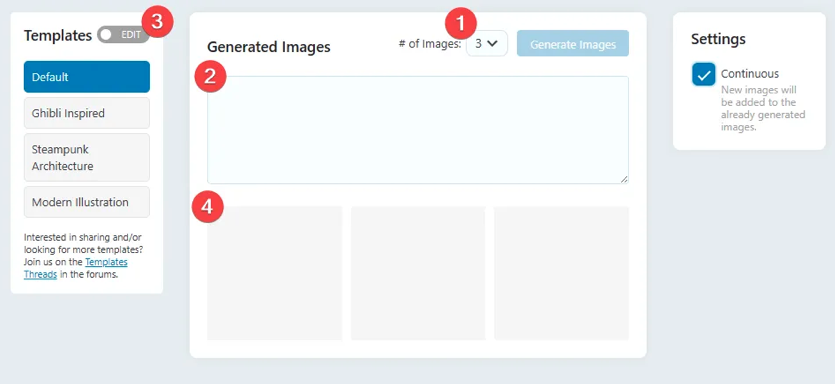
Once on the Images Generator, different settings will be available:

1. Number of images: You have the option to generate images in batches. You can also use the Continuous option to add the previously generated images to the current ones.

2. Prompt input: Describe the image you wish to generate.

3. Templates: When you have entered some prompts you don’t want to lose, you can save them and reuse them later as templates. Switch to edit mode to update/add new ones. You already have some ready for you.

4. Images: Once generated, the images will be displayed at the bottom of the page, under the prompt area.

Image Edits

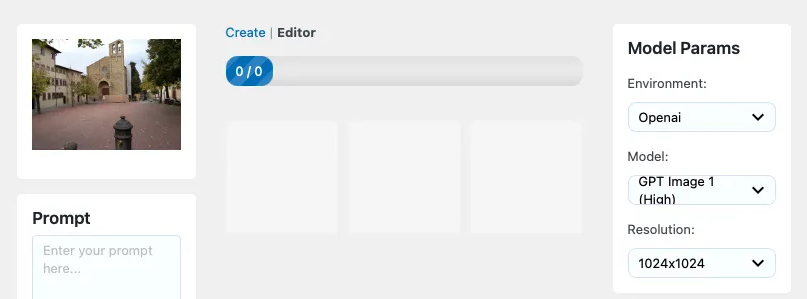
For models that are compatible (right now only the OpenAI GPT Image 1), you can also do image editing. To do this, go to your media library, select an image, and use the “Edit” menu (with the magic wand icon). This will open the image in the AI Engine Image Editor tool.

Image Edits In Chatbot

You can also enable image editing behavior within a discussion thread by taking advantage of OpenAI Tools. If you’re using a vision-enabled model, you can create a workflow where the model first visualizes the image, generates a description of it, and then uses your prompt along with that description to generate a new image that appears as an edit of the original.

Managing Limits

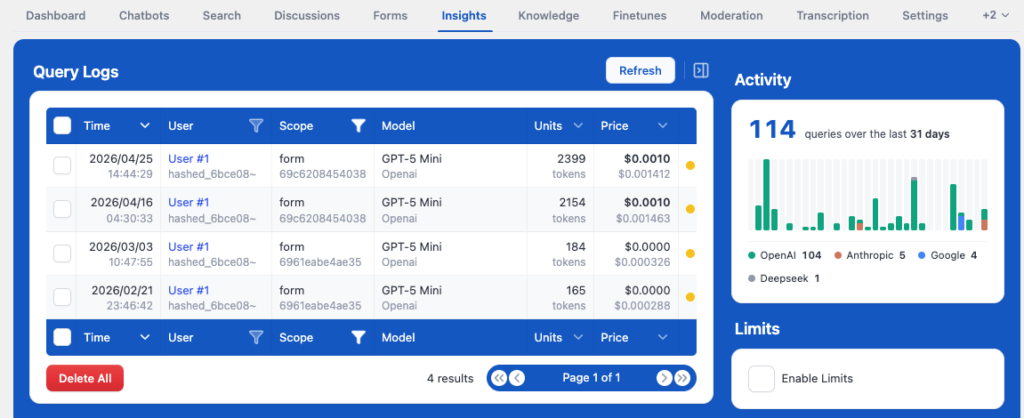
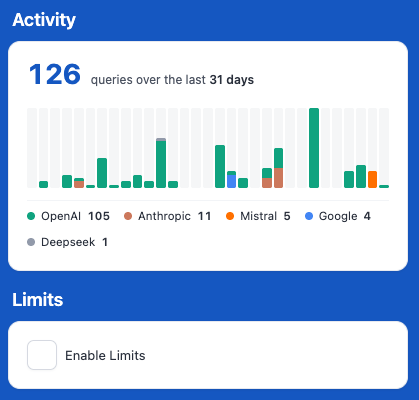
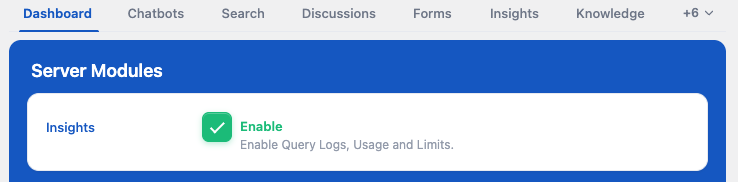
First, you need to enable the Insights feature. Go to the dashboard of AI Engine and check the corresponding option:

This will add a new tab in AI Engine settings. Now you can go to the “Insights” tab. Here, you will find a list of all the queries that are being made to your chatbot. You can also enable the limits here.

By the way, if you want to see the logs of any of these queries, you will need to go to the “Settings” tab and enable the “Queries Data” option.

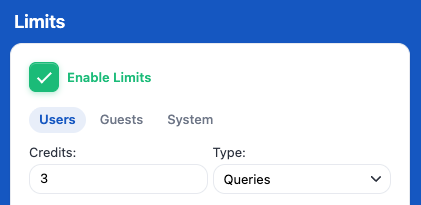
Once you have enabled the limits, you have different settings that you can tweak, such as the number and type of credits (Queries, Tokens, and Dollars). You can also set the timeframe for each of these limits to reset.

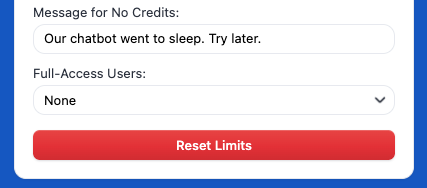
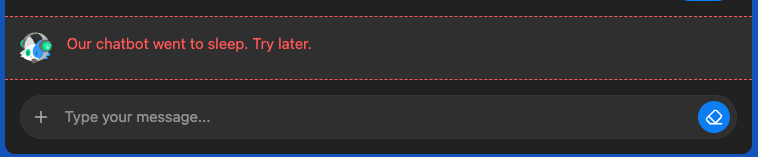
Be careful, there are three different settings tabs here: User, Guests, and System. Take a look at the message that will be sent by the chatbot when the user reaches its limit for each of those.

The “System” setting will apply to every type of user. It’s kind of like your website’s maximum limit, so make sure to set this up correctly as well.

If you want to customize the limits based on your users’ roles or any meta data, you can use the PHP Filters such as mwai_stats_credits and mwai_stats_coins. See the examples below.

How to check user’s usage

The usage is not a value you can see directly, as it’s not a meta that’s stored per user—it’s calculated on the fly whenever your user makes a query. The system compares the number of queries in the user’s history to the max credits allowed over the specified timeframe.

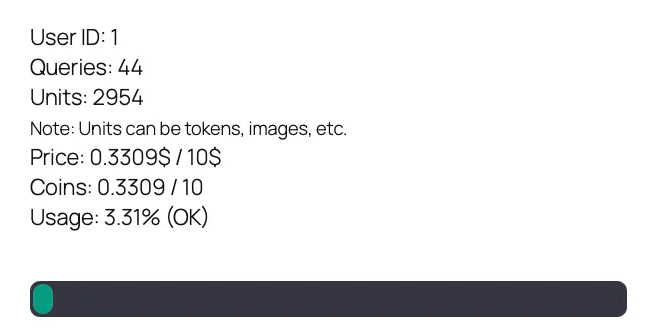
You can visualize that by using the following shortcodes:

[mwai_stats display="debug"]
[mwai_stats_current display="usage"]

All the available parameters for the shortcode:

  • display: debug, usage
  • display_who: true, false
  • display_queries: true, false
  • display_units: true, false
  • display_price: true, false
  • display_usage: true, false
  • display_coins: true, false

Non credits limitation

If you are looking for ways to block access from different parameters, such as time (only available from 2 p.m to 4 p.m), currently, there are no out-of-the-box features to accomplish this. However, you can achieve it yourself by using AI Engine filters. By using the mwai_ai_allowed($allowed, $query, $limits) function, you can check the timing of the user’s query and return an error message if the timeframe is not suitable for you.

Rather than using filters, you can completely overwrite the chatbot shortcode so that it only displays under specific conditions — such as within a certain time range, user role, or other custom logic.

To learn more about how to do this, check out this documentation: Shortcode Overwrite & Conditional Logic

This approach gives you full control over when and how the chatbot appears on your site.

You can also come up with a solution on the client side. Using JavaScript, you can check the current time and then select the chatbot using its ID to disable it. You can do this by either hiding it or disabling the input with CSS, or even deleting the DOM element.

Can I use a membership plugin?

You can define a limit on the number of credits (queries, tokens, or dollars) a user can spend over a given time frame (month, day, year). When a query is made, the plugin checks the history of queries during that period and verifies whether the number of queries, tokens, or dollars exceeds the chosen value. That’s it.

The plugin doesn’t need to know whether you’re using a third-party plugin to manage roles or access—it just needs to know the number of credits you allow to be used. This value can be dynamically adjusted using filters:

  • mwai_stats_credits($credits, $userId) → modifies the number of credits (allows you to create your own system)
  • mwai_stats_coins($price, $stats, $atts) → modifies the coins (lets you convert the price you personally pay to OpenAI into your own system of coins that you share with your users)

So in your case, you can use the mwai_stats_credits filter to fetch the user’s metadata and return its value. This will override the credits you set manually in the Limits settings. Then, when the plugin checks the query history over the timeframe, it will compare the number of credits (X—your WooCommerce metadata) against the credits used in recent queries.

add_filter( 'mwai_stats_credits', function ( $credits, $userId ) {
  $user = get_userdata( $userId );
  if ( !empty( $user->roles) && is_array( $user->roles ) ) {
    foreach ( $user->roles as $role) {
      if ( $role === 'premium' ) {
        return 50;
      }
      if ( $role === 'standard' ) {
        return 10;
      }
    }
  }
  // This will be basically the default value set in the plugin settings
  // for logged-in users.
  return $credits;
}, 10, 2);

Let’s assume your user has a corresponding “custom_credits” value. When a user purchases credits, you just need to add them to this number.

add_filter( 'mwai_stats_credits', function ( $credits, $userId ) {
    $user = get_userdata( $userId );
    if ( !empty( $user->custom_credits ) ) {
        $credits = $user->custom_credits;
    }

    return $credits;
}, 10, 2);

For more details on all available filters, check the PHP Filters reference.

Soon, the AI Engine will propose a new system for the Timeframes, which will make it easier for you to create subscription logics:

Rolling Window: Limits are based on the queries made in the preceding period, continuously updating. For example, within the last day up to the current moment. Ideal to avoid sudden spikes in number of queries.

Fixed Window: Limits are based on a defined calendar period, resetting at the start of each new period. For instance, limits reset daily at midnight. Ideal for predictable usage patterns.

Subscription Window: Limits reset based on the anniversary of the user’s first query, e.g., monthly on the same day as the first ever query. This day can be overriden through a WordPress filter. Ideal for subscription-based services.

Build your own logic

You can also use the mwai_ai_allowed filter while disabling the built-in limit system to create your own custom logic for determining whether a query should be allowed.

Here are a few quick examples to get you started:

add_filter( 'mwai_ai_allowed', function( $allowed, $query, $limits ) {

    // Only apply to text queries
    if ( ! ( $query instanceof Meow_MWAI_Query_Text ) ) {
        return $allowed;
    }

    // Always allow a specific chatbot, free to use / limitless
    if (
        isset( $query->botId ) &&
        $query->botId === 'chatbot-free'
    ) {
        return true;
    }

    return $allowed;

}, 10, 3 );
add_filter( 'mwai_ai_allowed', function( $allowed, $query, $limits ) {

    // Only apply to text queries
    if ( ! ( $query instanceof Meow_MWAI_Query_Text ) ) {
        return $allowed;
    }

    // If guest user, keep default behavior
    if ( ! is_user_logged_in() ) {
        return $allowed;
    }

    $user_id = get_current_user_id();
    $available = (int) get_user_meta( $user_id, 'available_messages', true );

    // Block if no messages left
    if ( $available <= 0 ) {
        return false;
    }

    // Decrement and save
    update_user_meta( $user_id, 'available_messages', $available - 1 );

    return $allowed;

}, 10, 3 );

Assistants (OpenAI)

Assistants are being deprecated by OpenAI
End of life is planned for mid-2026. We recommend using OpenAI models directly with the appropriate tools instead. For knowledge bases, you can use a Vector Store directly, which provides the same capabilities as Assistants (and often better performance). AI Engine is focusing development efforts on the Responses API going forward.

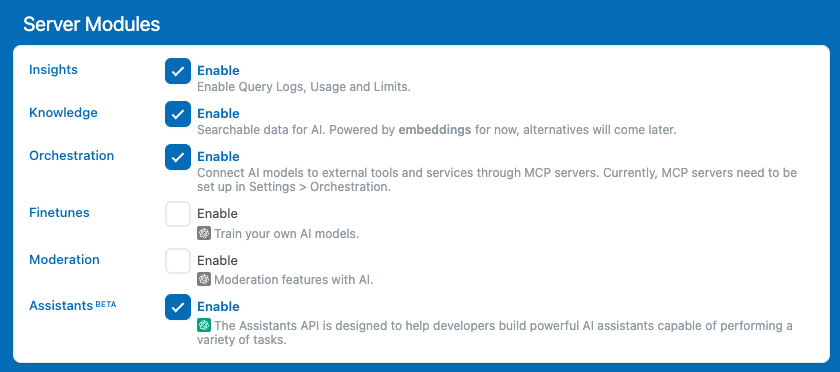
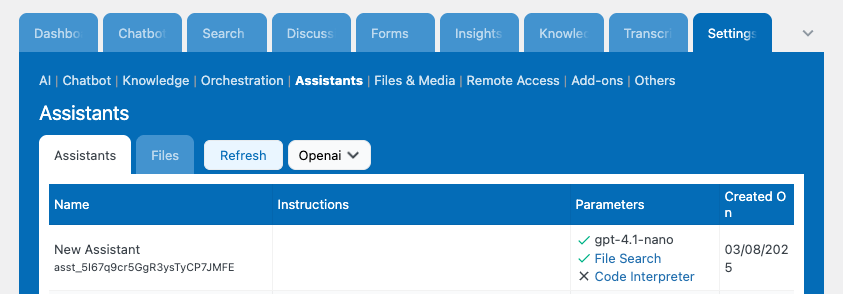
First, you will need to access the AI Engine dashboard and, under the “Server Modules” tab, enable the Assistants feature.

This action will generate a new section in the settings where you can view all of your OpenAI assistants. This is a read-only section, you wont be able to modify or add assistants from there, everything will be done on the OpenAI side.

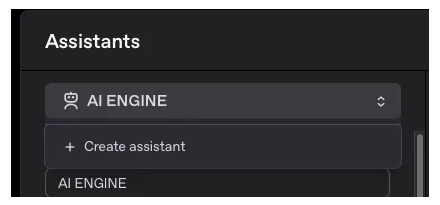
To create them, head to the OpenAI Assistants dashboard.

Once you’ve created one or have some assistants ready, return to the AI Engine Assistants section and click the refresh button in the top right corner. You should see it/them appear in the table.

There’s no need to return to this tab anymore. Now that the assistant is available, let’s proceed to use it!

If you don’t see your assistants after refreshing the list, make sure that your server can communicate with OpenAI and that your WordPress REST API is operational and you have the right permalinks configured.

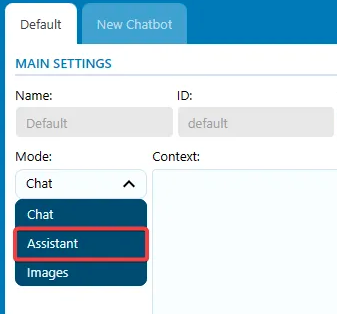
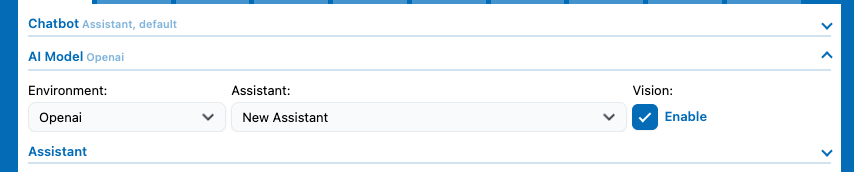
For this, navigate to the chatbot tab where you operate your regular chatbots for AI Engine. Select or create a new chatbot, and in the Main Setting section, you will be able to change the chatbot mode to assistant.

And it’s done! You are now using your OpenAI assistant directly within AI Engine. Have fun! 😊

File Upload

When using an Assistant this enables your users to send files directly through your chatbot, to learn more please read this documentation.

Organizations’ assistants

You can connect to your OpenAI account and go to the API Keys section to select your default organization. If it’s already the case, switch to personal, confirm the dialog box, and switch back to your organization to reset. Then, you’ll need to create a new API Key so that the header matches. Once this is done, you can refresh the assistant in AI Engine, and you should see it appear! 😊