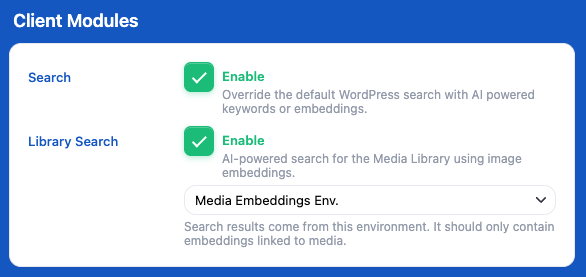
AI Engine also allows you to override the default WordPress search with an AI-powered search based on keywords or embeddings.
The default WordPress search can be limited, especially if your posts are not properly indexed, tagged, or optimized, which can lead to missed results.
With AI Engine, you can use the same RAG mechanism as the chatbot does with your content via embeddings. Alternatively, if you don’t use embeddings, you can rely on AI-powered keyword search to surface relevant posts that might not appear with traditional search methods.
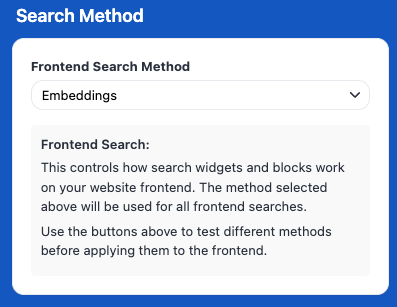
This will add a new tab called “Search”. There, you can select which type of search you want to use and test them directly inside the plugin.
Simply choose your preferred option in the “Search Method” section.
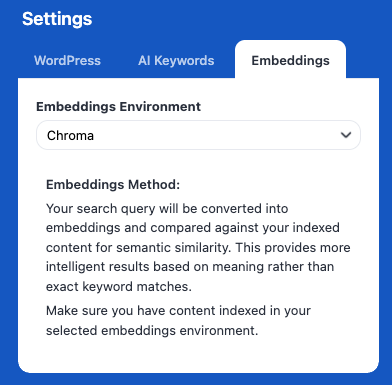
Depending on the method you choose, you may need to configure additional settings in the Settings section just below. Make sure to review and complete those as well.
Each method also includes a description to help you understand what it does.
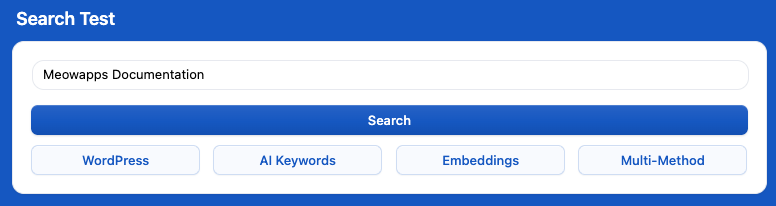
Finally, you can simply click “Search” to try the selected method.
If you want to try another method, you can use the corresponding button under the search options.
You can also use “Multi Method” to compare results across different approaches before choosing the one that works best for you.
This way, you don’t need to create your own AI-powered widget or rely on a specific AI Engine shortcode to build a search bar. You can keep using your existing setup, and the search process (as long as you’re using the default WordPress search and not a third-party solution like Elastic) will automatically become AI-powered.
Content Generation
AI Engine can help you generate content for your website. However, at Meow Apps, we do not support the idea of fully AI-generated content. We believe this approach can create unnecessary content bloat on your site and across the internet. Additionally, purely AI-generated content can be easily detected by modern AI and web search tools, which may negatively impact your site’s SEO.
What we advocate instead is human-written content enhanced by AI assistance. AI should be used as a tool to help you work faster, write more clearly, and explore new ideas, not to replace human creativity and expertise.
With that in mind, here are some effective ways AI Engine can support your content creation workflow.
Content Generator
The Content Generator is not intended to be a tool for producing high-quality, publish-ready content. That’s why it is not receiving ongoing updates or advanced configuration options. Its primary purpose is educational: to help users explore ideas and experiment with AI-generated text.
You can open the AI Engine Dashboard and, under Admin Modules, enable the Content Generator.
You’ll also find a family of generator tools available for creating images and videos, allowing you to explore different types of AI-assisted content directly from the dashboard.
This will add a 🪄 Content section to the header of the AI Engine dashboard.
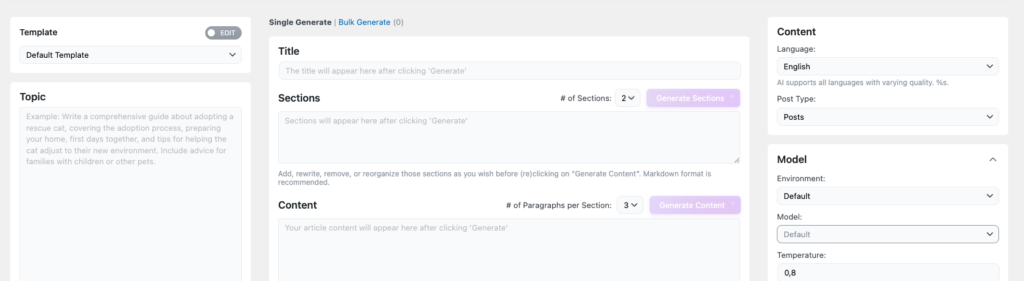
When you open this menu, you will see three sections arranged from left to right:
Template / Topic Prompting on the left, where you can define the structure or idea for your content.
Your Content in the center, where the generated text will appear and can be edited.
Model Settings on the right, where you can adjust parameters such as the model, creativity level, and other generation options.
This feature does not include image generation for direct integration into your content.
Content Assistant
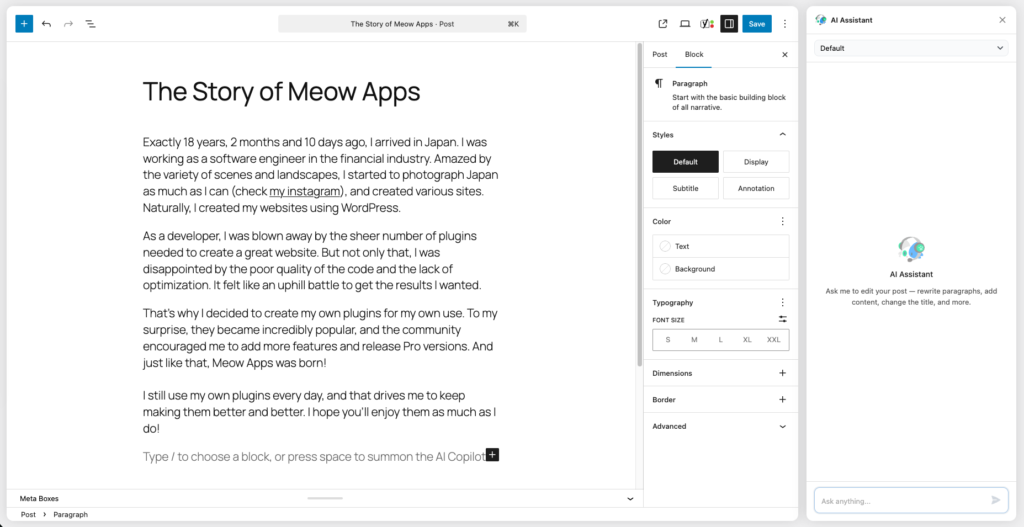
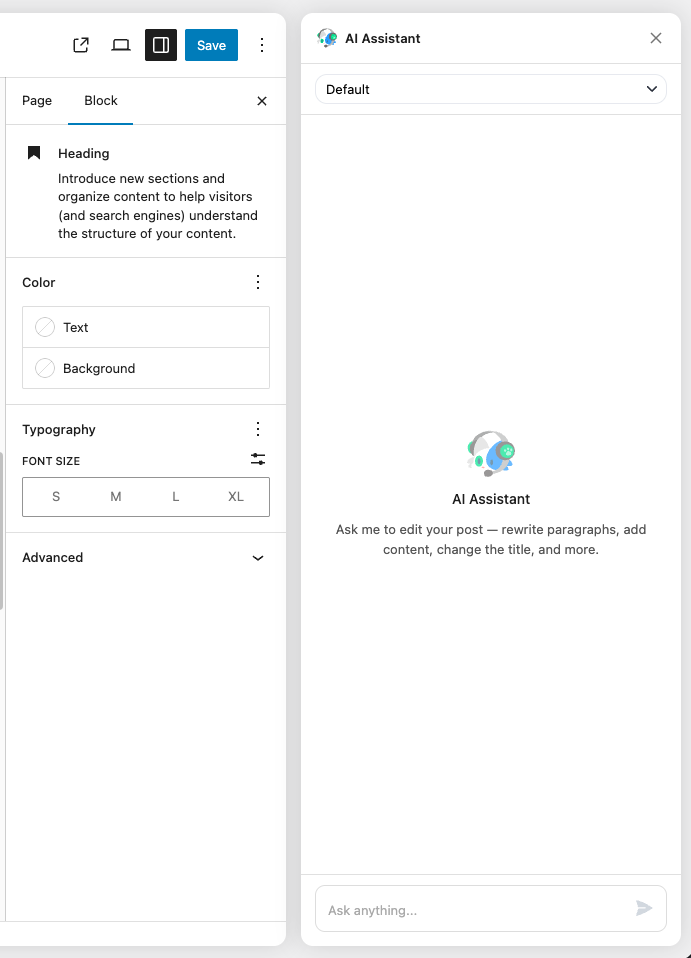
As the name suggests, this is not a direct content generation tool but rather an assistant tool. It adds Nyao as a popup chatbot within your post editor, allowing you to interact with it while you write.
With Nyao, you can ask for help refining your text, generating ideas, improving clarity, or rephrasing content in real time without leaving the editor, interact with blocks and more. This makes it a convenient companion for enhancing your writing workflow directly inside WordPress.
You can open the AI Engine Dashboard and, under Admin Modules, enable the AI Assistant.
Once you click the popup, a side panel will open where you can interact with the chat assistant. This feature works with the default WordPress content editor, Gutenberg, allowing you to get assistance directly while editing your posts or pages.
The assistant has access to your WordPress Media Library, allowing it to add and manipulate images directly within your content.
MCP
MCP (Model Context Protocol) is a standardized bridge that allows AI applications (clients) to easily access tools exposed by a service. In this case, AI Engine exposes these tools through your WordPress REST API, enabling the AI to interact with your WordPress site much like a user would. This includes performing actions such as creating content, retrieving data, and managing various aspects of your website directly through AI-driven workflows.
This is the most advanced post generation tool available to date. Although AI Engine MCP is not specifically designed to generate post content, its access to all WordPress core tools makes it the best overall solution for helping you write and produce high-quality content.
You can review and edit existing content, add/generate images, refactor text, explore new ideas, improve SEO, clean/analyze current content and more by taking advantage of a wide range of powerful features.
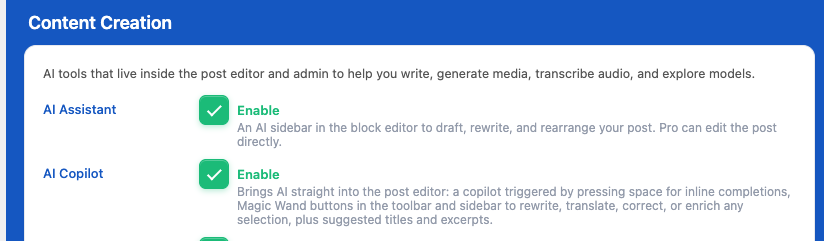
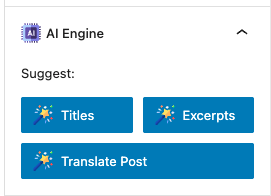
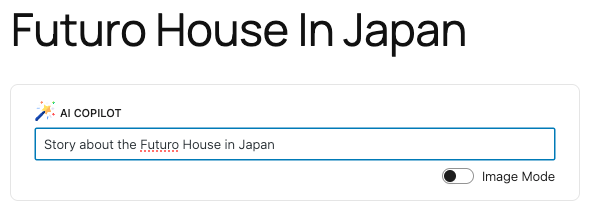
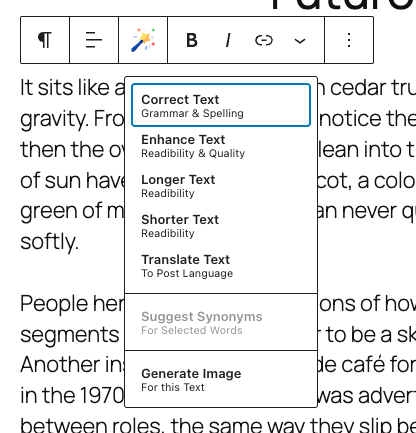
AI Engine can also help you directly inside your posts through Magic Wand icons, and with a chatbot popup, which trigger AI-powered automated actions such as generating content, media, and more for your posts.
Start by enabling the “AI Copilot” module in the Admin Modules settings.
This features are designed to work with the WordPress Gutenberg block editor.
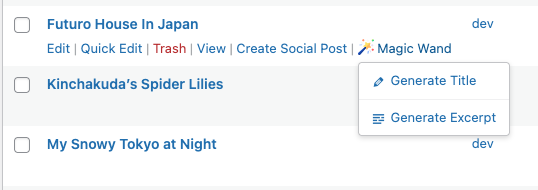
Then you’ll be able to trigger the Magic Wand from different places:
Post listing table
Post settings
Post content ( press space to trigger )
Post blocks
Copilot
You will also have a Nyao pop-up icon in the bottom right corner of your screen.
If you click on it, it will open up a side panel, which is literally an AI engine chatbot. It is powered by a suite of function-calling tools made for post-editing, so you can ask it to write, correct, change, or update anything, and it will do it in front of you.
Magic Wand Customization
The Magic Wand module in AI Engine allows you to customize the instructions (prompts) sent to the AI for each feature.
To modify the instructions sent to the AI, you can use the `mwai_prompt_{actionName}` filter. This allows you to change the system prompt or the instructions wrapper without replacing the entire logic.
The following actions are available for customization:
correctText (Correct Text)
enhanceText (Enhance Text)
longerText (Longer Text)
shorterText (Shorter Text)
translateText (Translate Text)
translateSection (Translate Post Section)
suggestSynonyms (Suggest Synonyms)
generateImage (Generate Image)
suggestExcerpts (Suggest Excerpts)
suggestTitles (Suggest Titles)
If you want to change the behavior of the “Correct Text” feature (e.g., to make it more formal), you can use the following code snippet in your theme’s `functions.php` or a custom plugin:
add_filter( 'mwai_prompt_correctText', function( $prompt, $arguments ) {
    // $prompt contains the default instruction.
    // $arguments contains context like 'postId', 'text', etc.

    // Return your custom instruction
    return "Correct the grammar and spelling in this text. Please ensure the tone is professional and formal. Keep the same language.\n\n";
}, 10, 2 );
If you need to completely change how a feature works (not just the text prompt), you can hook into the `mwai_magic_wand_{action}` filter. This filter expects the result array to be returned.
add_filter( 'mwai_magic_wand_correctText', function( $result, $arguments ) {
    // Perform your own logic here
    // ...

    return [
        'mode' => 'replace',
        'type' => 'text',
        'result' => 'This is the replaced text.',
        'results' => ['This is the replaced text.']
    ];
}, 10, 2 );
External Integration
You can use your AI Engine environments and chatbots on third-party services using the public REST API. You also have the possibility of integrating your chatbot UI — along with its full configuration and connections — into any other website you want using cross-site script integration, even if it’s not running WordPress!
Cross-Site is a Pro feature — it only appears when AI Engine Pro is active. On the free version of AI Engine, the option is not shown anywhere.
If you’re interested in using your AI Engine environment and chatbots in external applications like Discord, WhatsApp, webhooks, and more, you’ll need to use the REST API. You can learn more about it here: AI Engine REST API.
1. Enable Cross-Site globally
Go to AI Engine → Settings and, in the Frontend Extras box (alongside AI Forms and Search), enable Cross-Site.
2. Configure the chatbot
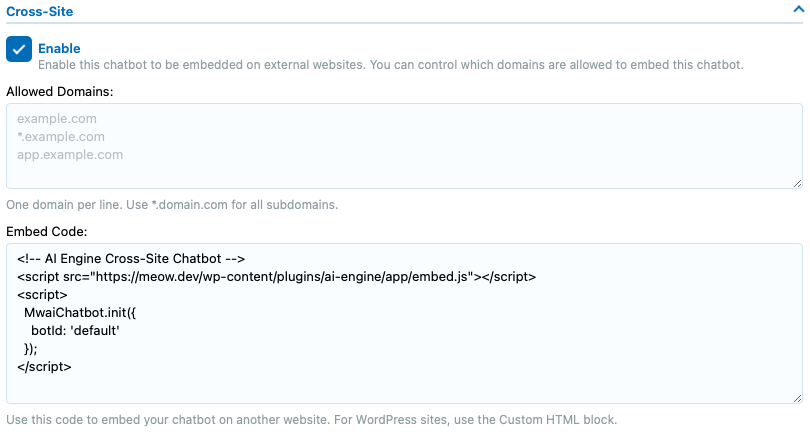
Open the Chatbots tab and select the chatbot you want to embed. In that bot’s settings, open the Cross-Site section, enable the option there, and you’re done.
Note: the Cross-Site section appears for standard (shortcode) chatbots, not for chatbots used in Gutenberg block mode.
You need to register the domains on which you want to load the chatbot scripts. If you don’t do so, the script requests will be rejected due to CORS. This ensures your chatbots can’t be used without your consent by someone else trying to load the same scripts.
Now you can just copy and paste the “Embed Code” into any webpage you want.
If you’re doing this on WordPress, either insert it inside a script that is loaded or use a Custom HTML block in your post directly.
If you’re using it on a site that doesn’t run WordPress, make sure you don’t insert it as plain text — the content must be interpreted as HTML so the scripts can load properly.
Discussions
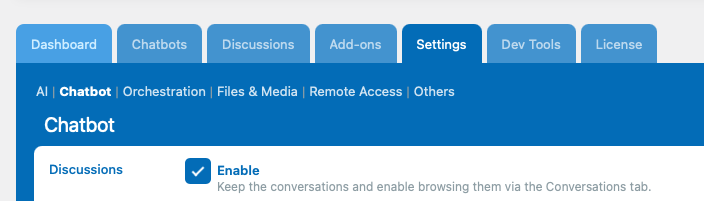
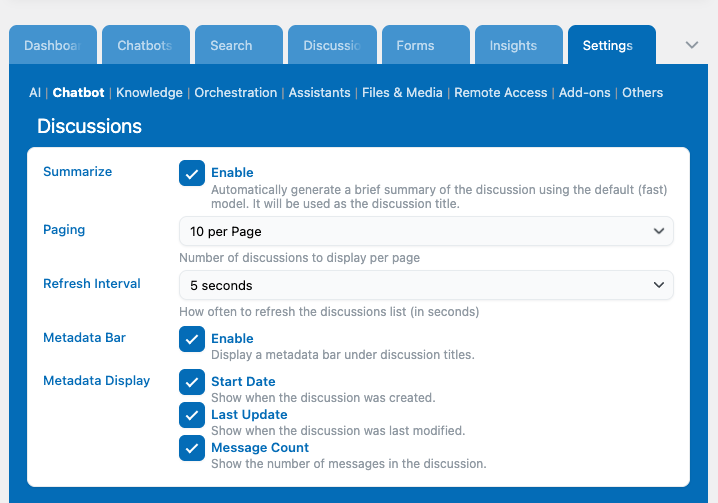
You can go into the settings and, under the Chatbot section, enable the Discussions feature.
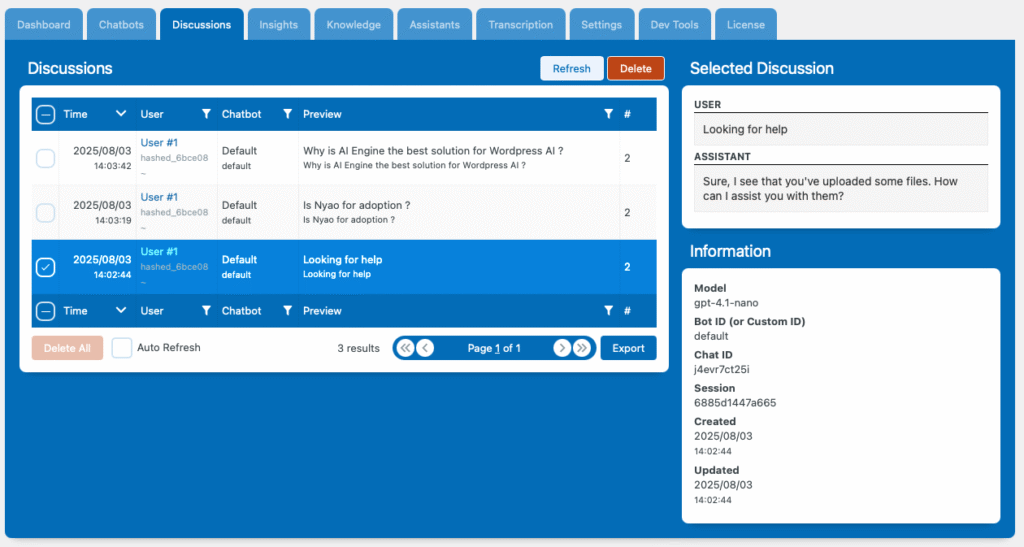
This will add a new tab where you can view a history of all the conversations that have taken place in your chatbots, presented in a human-readable format.
All of this data remains entirely on your server—Meow Apps does not process or store any of it. You can read this article to learn more.
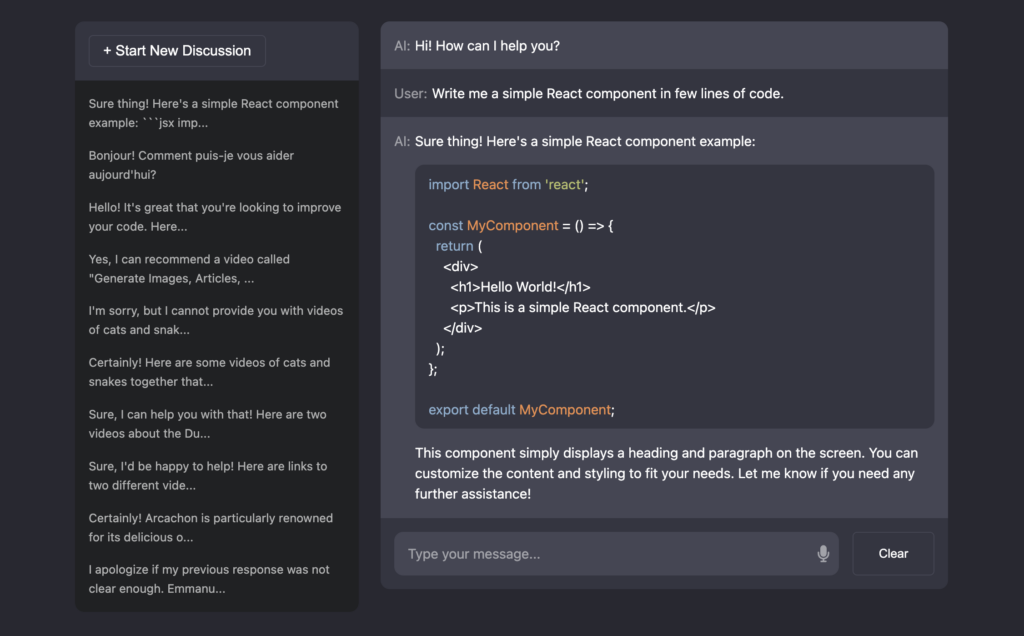
You can add a list of the discussions (like ChatGPT) next to your chatbot, by using the mwai_discussions shortcode on your website so each user can see it’s history of conversation.
[mwai_discussions id="default" text_new_chat="+ Start New Discussion"]
You can go to Settings > Chatbot > Discussions to change the display for this shortcode. By default, when the shortcode is loaded on a page, all recent discussions will be fetched every 5 seconds. If you prefer to avoid repetitive requests, you can either lower this value or use a manual refresh option instead.
Local Memory
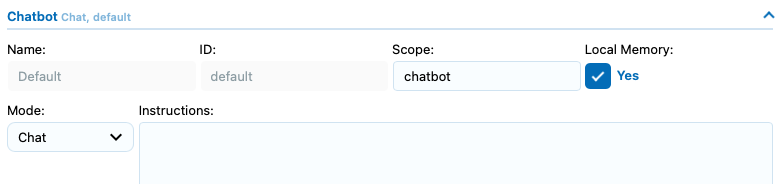
If you enable the Local Memory option for your chatbot, the current discussion thread will be saved in the user’s browser local storage—not in your database. This means the conversation will persist even if the user refreshes the page or navigates to a different one, effectively caching the chat locally.
However, since this is browser-based, the conversation will not be preserved if the user clears their local storage, switches devices, or uses a different browser.
History Strategy
If the model you have selected supports Responses (OpenAI) you will find a new setting section in your chatbots settings called “Advanced” in which you can choose the History Strategy, which basically dictates how the previous messages from the thread are sent into the current query history to maintain context.
Available Options
Automatic
Best choice for most users as it optimizes performance while ensuring reliability
Default setting that intelligently chooses the best strategy for each situation
Uses Incremental mode when a valid previous_response_id is available
Automatically falls back to Full History mode when:
No previous response ID exists (first message in conversation)
The response ID has expired (after 30 days)
The response ID is invalid or corrupted
Incremental
Uses OpenAI’s previous_response_id parameter to maintain conversation state
Only sends the latest message instead of the entire conversation history
More efficient in terms of:
Reduced token usage (potentially lower costs)
Faster processing times
Lower bandwidth usage
Limitations:
Only works with valid response IDs (expire after 30 days per OpenAI policy)
Requires the conversation to have been initiated with Responses API
May fall back to Full History if response ID becomes invalid
Full History
Sends the complete conversation history with every request
Traditional approach used by most chat implementations
More reliable for complex conversations with many turns
Higher resource usage:
Increases token consumption
Larger request payloads
May impact response times for long conversations
Always works regardless of conversation age or API changes
Chatbots
Chatbots are the most used feature of AI Engine. Once yours is running, these pages cover how to shape it: its look and behaviour, the conversations it keeps, the moderation you can apply, and how to let visitors talk to it.
An MCP server works as a structured API-like interface for AI models: the client (such as the Claude app) connects to the server, which exposes a set of endpoints declaring available tools and functions. This enables the model to perform actions like querying, updating, or managing your WordPress content.
You have two main approaches:
Using your WordPress as the MCP server: Claude connects to your WordPress site and gains capabilities based on what is exposed through AI Engine.
Using Claude inside AI Engine: Here, Claude becomes the internal model in AI Engine, and it can connect to a remote MCP server (another site, for example).
WordPress MCP Server
This will allow MCP-compatible application (like ChatGPT and Claude desktop/web app) to connect to your server, fetch all the tools available via AI Engine, and interact with your site by querying these different tools.
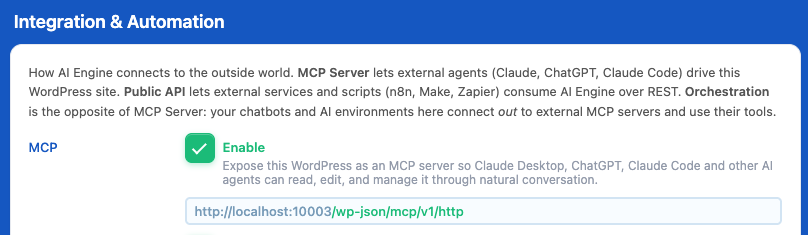
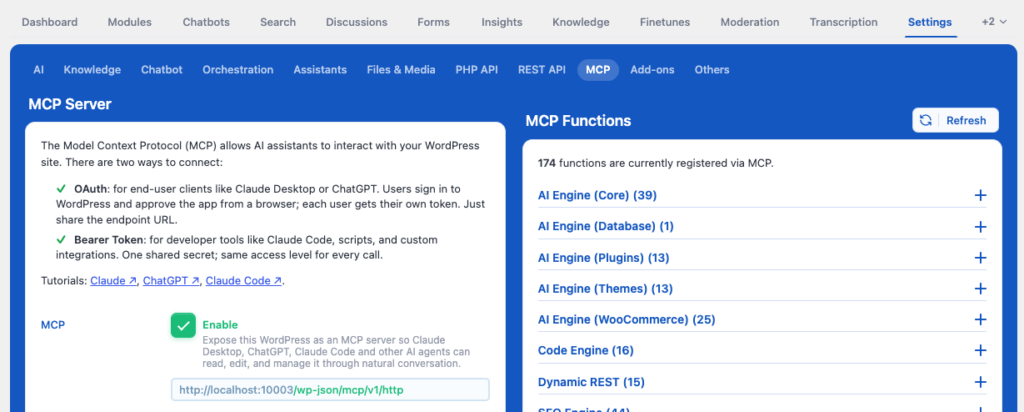
First, go to AI Engine settings, and under the MCP section make sure to enable the MCP option, as this will be like enabling the REST API but for AI applications. You can also set a Bearer token, which is an authentication token that you need to keep secret, otherwise anyone could potentially interact with your server.
Using MCP no longer requires the use of SSE, which makes the process much more reliable and easier to set up.
Then you can select all the different “endpoints” (or “tools” if your prefer) that the MCP server will expose. Go to the MCP Features section and select the ones you need. You will see all of them listed there with details about what they do.
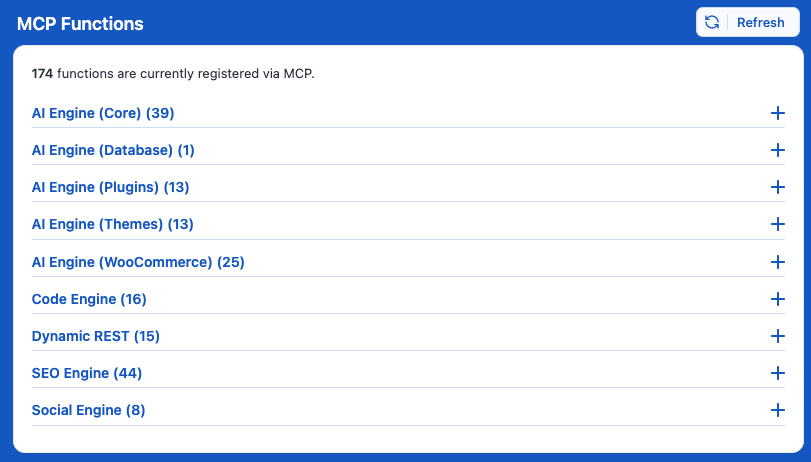
Discover all the already available tools exposed through the AI Engine MPC:
AI Engine Free
Core WordPress MCP
Content Management: Create, update, delete posts and pages with full control over titles, content, status, categories, and tags.
Comment Moderation: View, create, update, and delete comments.
User Management: Create users, update profiles, and manage roles.
Media Library: Upload images, manage attachments, and set featured images.
Taxonomies: Create and manage categories, tags, and custom taxonomies.
Settings: Update WordPress options and configurations.
Vision Analysis: Analyze images using AI vision capabilities.
Key Operations: 36 tools covering all core WordPress functionality with proper read/write separation.
Dynamic REST (Raw API Access)
Provides direct access to WordPress’s native REST API endpoints for generic operations — useful for developers who prefer working with standard REST structures.
AI Engine Pro ✨
Plugins MCP
Plugin Discovery: List and search installed plugins.
Plugin Lifecycle: Install, activate, deactivate, update, and delete plugins.
Code Management: Read, create, edit, and delete plugin files.
Advanced Features: Fork plugins to create custom versions.
File Operations: Full access to plugin directory structure.
Key Operations: Complete plugin management, from installation to code-level modification.
Themes MCP
Theme Management: List, install, activate, and delete themes.
Customization: Read and modify theme files (PHP, CSS, JS).
Theme Development: Fork existing themes to create custom versions.
File Operations: Create, edit, and delete theme files.
Asset Management: Handle theme assets and templates.
Key Operations: Full theme lifecycle management including code-level customization.
Any plugin that is compatible with AI Engine MCP and exposes some MCP tools will add those tools for the connected AI application. For instance, if you have SEO Engine installed, Claude or ChatGPT will be able to run SEO-specific processes like scanning your posts for SEO, getting their score, metrics, and more.
If you are a developer, you can build new tools or make your already existing plugin compatible with MCP without doing all the hard work yourself, you can do it through AI Engine by reading this documentation.
You are now ready to control your site through an AI application, follow the article for the service you want:
Claude – Needs a bridge (CLI configuration) between your server and Claude to function.
Claude Code – Control your WordPress site directly from your console terminal.
Open Claw – Let your AI Agent have access to your WordPress Site.
AI Engine vs. Automattic’s Implementation
Automattic’s Dynamic REST approach exposes WordPress’s REST API through MCP, but it’s complex and not very AI-friendly. It uses verbose data structures, requires technical setup, and lacks context about what’s safe or destructive — making errors more likely. In contrast, AI Engine’s Optimized Tools are built for AI from the ground up, using simple function-like commands, clear parameters, and concise responses. They include smart annotations for safety, advanced features like plugin editing and theme forking, and deliver faster, more efficient, and easier-to-understand interactions for both users and AI assistants.
MCP Orchestration
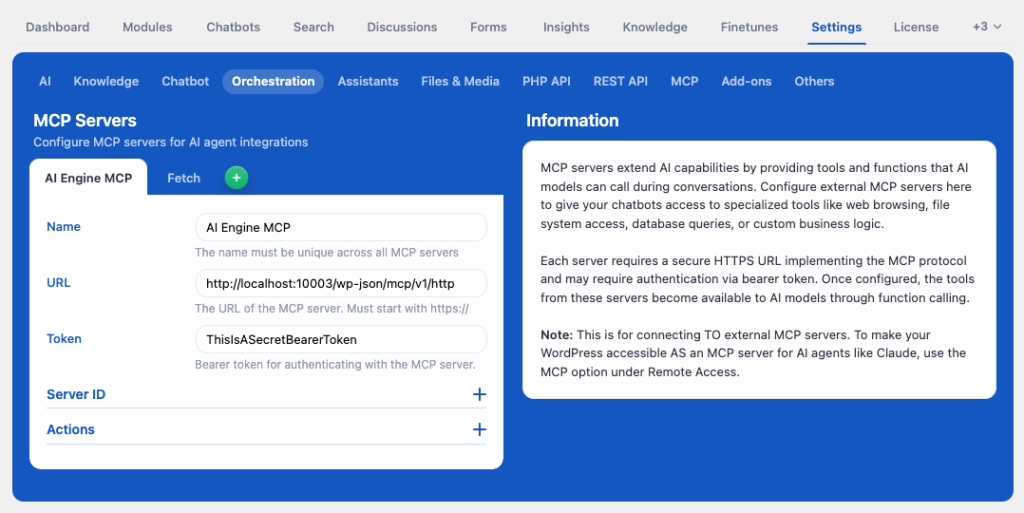
This will allow your chatbot in AI Engine to query distant MCP servers to run tools outside of your current WordPress environment and use the results in chat. You can think of it as using Function Calling but remotely with tool already made by third party providers.
As you can make your own server an MCP server by reading the above section, you can indeed connect your own site’s MCP server to your chatbot, or connect a different WordPress site to the current one.
First, go to the Modules and under the Integration and Automation enable the Orchestration option. This will allow you to go into Settings under a new section called “Orchestration.”
Now you will need to prepare your MCP server to register it on AI Engine. For the sake of this tutorial, we will use a free and no-authentication remote MCP server, but in your case, you might need to self-host your MCP server on a distant server or register and configure it from a third-party service.
Remember you don’t have to code anything, this is like function calling but the tools are already made for you and exposed like an API for your chatbot. If you are still hesitating about whether you should go with Function Calling or MCP you can read this documentation.
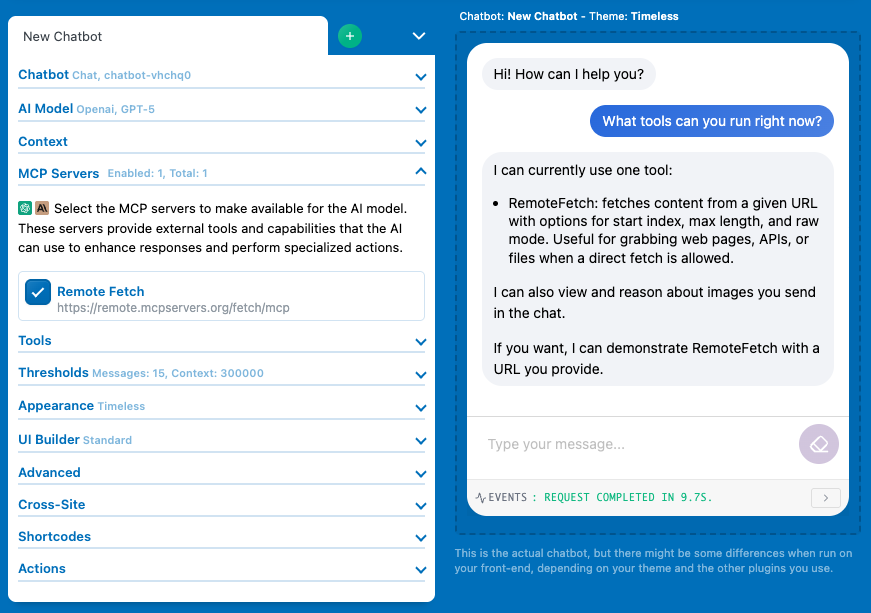
Let’s use https://remote.mcpservers.org/fetch/mcp to test this out. This is an open MCP server that provides web content fetching capabilities. This server enables LLMs to retrieve and process content from web pages, converting HTML to markdown for easier consumption.
Now we can select this server under the MCP Servers section of our chatbot settings, and the tools will be fetched from the server and declared as tools just like Function Calling.
If you don’t see the “MCP Servers” section, it could be because you haven’t selected a compatible AI model. Make sure you are not using “Default” or “None” and have actually selected a model, and ensure it is either an OpenAI or Anthropic model, as not all models are compatible with MCP.
Manage MCP access
MCP provides powerful WordPress management capabilities, so access must be strictly controlled.
By default, only administrators can access MCP endpoints. This prevents lower-privileged users (subscribers, contributors, etc.) from executing dangerous operations like creating admin users, deleting content, or modifying settings.
When a bearer token is configured, it overrides the default admin check, but access is DENIED unless a valid token is provided. This ensures MCP is secure even with default settings.
To restrict or customize access to MCP, you can use the “mwai_allow_mcp” filter. Here are a few examples.
<?php
// Example 1: Allow access based on user role
add_filter( 'mwai_allow_mcp', function( $allow, $request ) {
  // Allow if already authenticated as admin
  if ( $allow ) {
    return $allow;
  }

  // Allow editors and above
  if ( current_user_can( 'edit_posts' ) ) {
    return true;
  }

  return false;
}, 10, 2 );
<?php
// Example 2: Allow access based on specific user IDs
add_filter( 'mwai_allow_mcp', function( $allow, $request ) {
  // Allow if already authenticated as admin
  if ( $allow ) {
    return $allow;
  }

  // Whitelist specific user IDs
  $allowed_users = [ 2, 5, 42 ]; // User IDs
  $current_user = get_current_user_id();

  return in_array( $current_user, $allowed_users, true );
}, 10, 2 );
<?php
// Example 3: Allow based on role, but restrict certain tools by role
add_filter( 'mwai_allow_mcp', function( $allow, $request ) {
  // Allow if already authenticated as admin
  if ( $allow ) {
    return $allow;
  }

  // Allow contributors and above
  if ( current_user_can( 'edit_posts' ) ) {
    return true;
  }

  return false;
}, 10, 2 );

// Then restrict tools per role
add_filter( 'mwai_mcp_callback', function( $result, $tool, $args, $id, $mcp ) {
  $user = wp_get_current_user();

  // Only admins can execute dangerous tools
  if ( $tool === 'delete_post' && !in_array( 'administrator', $user->roles ) ) {
    throw new Exception( "Tool '{$tool}' requires administrator role" );
  }

  // Only editors and above can create posts
  if ( $tool === 'create_post' && !current_user_can( 'edit_posts' ) ) {
    throw new Exception( "Tool '{$tool}' requires editor role or higher" );
  }

  return $result;
}, 10, 5 );
Function Calling
Function Calling is the idea of letting the AI model know about a list of functions it can call. The model will then wait for the result of the executed function and do (or not) something with the output, if there is one.
Function Calling (also called Tools) needs some functions to be callable so they can be executed. Note that the AI itself does not run code—it can’t execute functions directly. Instead, it knows that it has access to a list of predefined functions that you’ve created.
When the AI model determines that it wants to execute a function, it sends back a reply with the name of the function and any necessary arguments. Then, your server (in the case of AI Engine) runs the function, generates an output, and sends it back to the AI model so it can finalize its response.
Dynamic and Static
There are two types of functions that can be called: Dynamic and Static.
A dynamic function is used to enrich the AI’s final reply with additional data. Dynamic functions can also be called in a cascade, depending on the functions you’ve defined and the AI’s decisions. For example, if you ask the AI to “send me an email,” it might first call a function to retrieve your email information, then call another function to actually send the email.
It’s recommended to use dynamic functions, as the final answer will be written by the AI and will therefore flow naturally. You can register your functions using Code Engine or manually.
Code Engine
Code Engine was previously called Snippet Vault, which is now deprecated. So make sure you’re using Code Engine to continue receiving updates.
The first step is to download the Code Engine plugin. This plugin is 100% free and can be used similarly to Code Snippet, but with even more features. If you’re familiar with Code Snippet, you can even import all your code from there for an easy switch. You can find the plugin here: Code Engine.
Code Engine allows you to store PHP and/or JS snippet code inside a dashboard and execute them whenever you want, even using a REST API.
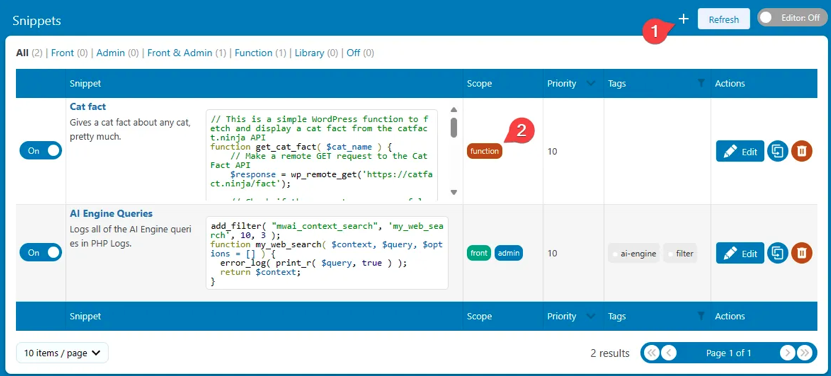
You have a special type of snippet in Code Engine called Callable. As the name suggests, this snippet can only contain one unique PHP function. You can declare its arguments and define them in specialized side settings. Once this is done, the AI model can use them easily, and you don’t have to do anything more on your side.
By using Code Engine, you can declare Callable functions that can be used in Function Calling. Code Engine and AI Engine will then work together automatically to handle the entire pipeline—asking to run a function → running the function → returning the result to the AI → continuing the query—without you needing to do anything. This is very powerful and is the only plugin on WordPress that can do this!
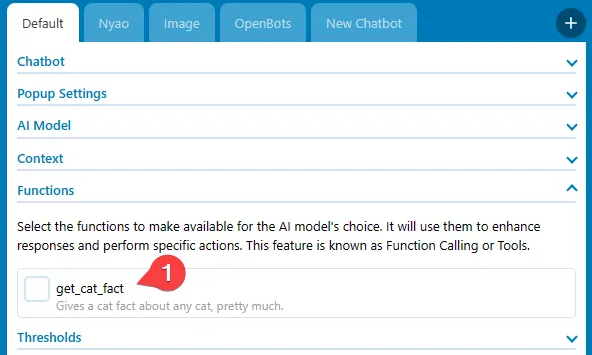
Simply navigate to your chatbot settings and locate the new “Functions” section. Then, select the function you want to use for the current chatbot session. From there, function calling is automatically handled, streamlining the process for you.
Here, we’re running a PHP callable function—so when the AI wants to run the function, it will be executed on your server. This is really useful if you need to access the database, get user information, fetch posts, and so on.
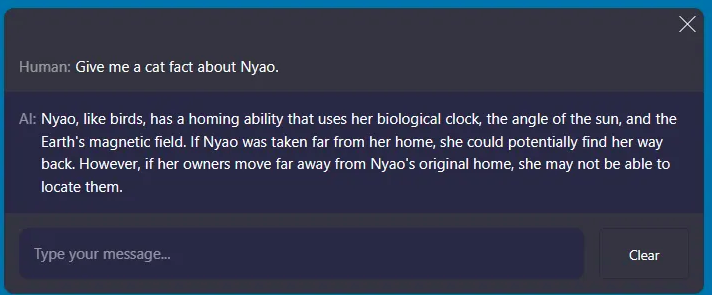
But it’s not limited to that. You can also create a JavaScript callable function to interact with your website. For instance, you could ask Nyao to change the color of the website—and watch it happen live!
Customization
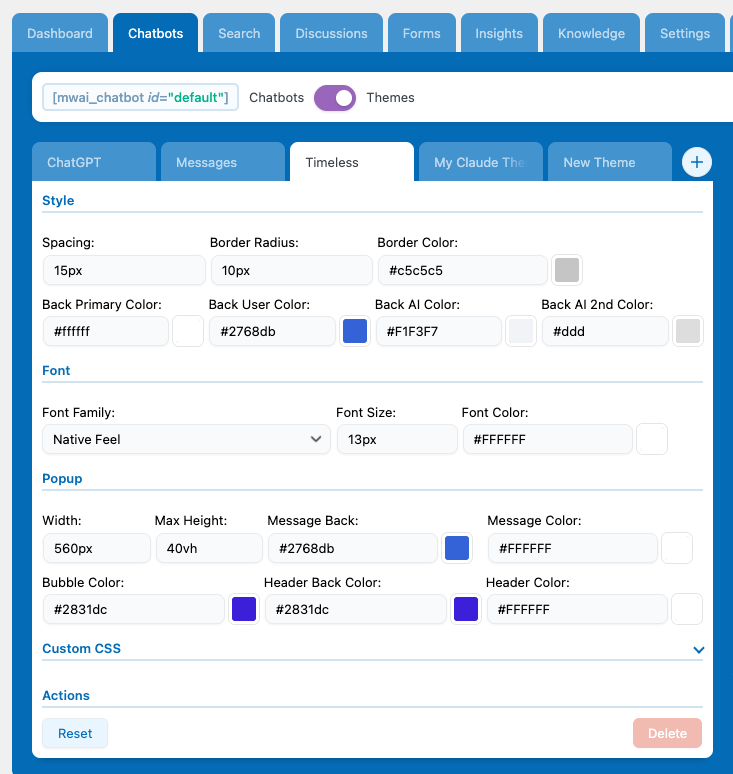
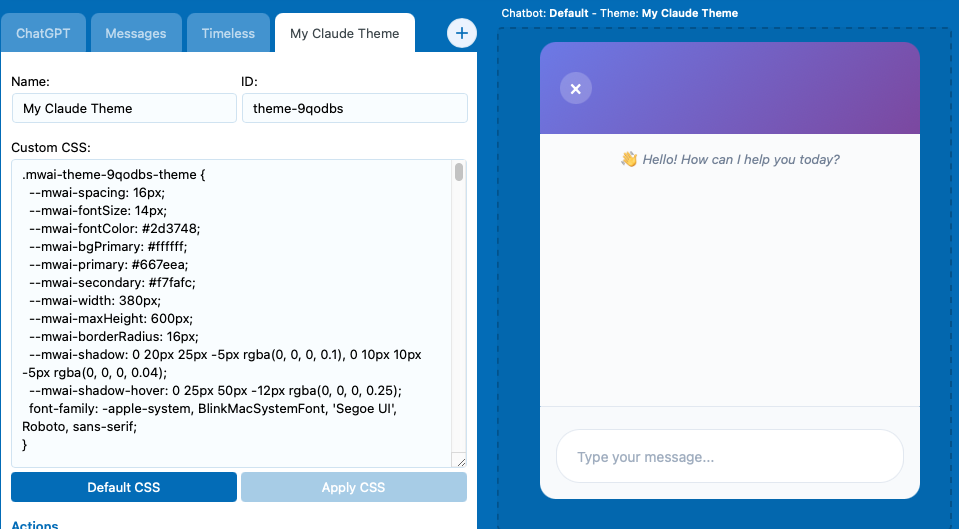
In the Chatbots tab, you can switch the toggle from Chatbots to Themes. There, you can modify the default themes that come with AI Engine using a no-code editor.
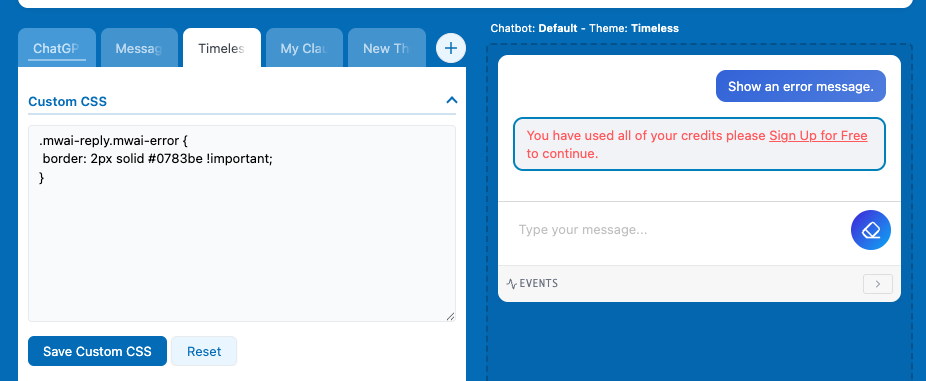
You can customize pretty much everything for the default themes (Timeless, Messages, ChatGPT) using the visual editor. But if you want to change something specific in an existing theme, you can use the Custom CSS section to adjust just that part instead of writing your whole theme from scratch.
If you want more customization, you can create your own theme by clicking the + button. This will open a CSS editor where you can manually use AI Engine’s chatbot class definitions to build your own custom design.
If you have some CSS ready to load, you can also use the following filter to change the CSS of your theme on the server side:
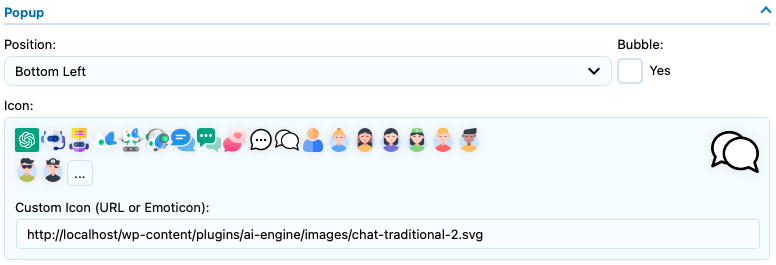
The icon refers to the chatbot pop-up image, which is only visible when your chatbot is configured as a pop-up—either because you’ve enabled that setting or are using the Site Wide Chatbot. The avatar, on the other hand, refers to the image displayed inside the chat itself, serving as the “profile image” of the chatbot and the user.
Settings
Make sure to enable the “Pop-up” option under the Appearance section to make the pop-up settings appear. In there, you’ll be able to choose an icon or enter a custom URL directly.
To change the avatar, simply check the “Avatar” boxes in the Appearance section and upload or select the desired images.
Shortcode
Using the shortcode of the chatbot, you can specify the icon param, with the URL of your icon, like this:
[mwai_chat icon="https://mywebsite.com/icon.png"]
To set the Avatar you can replace the name of the Chatbot by using a link instead of a regular text.
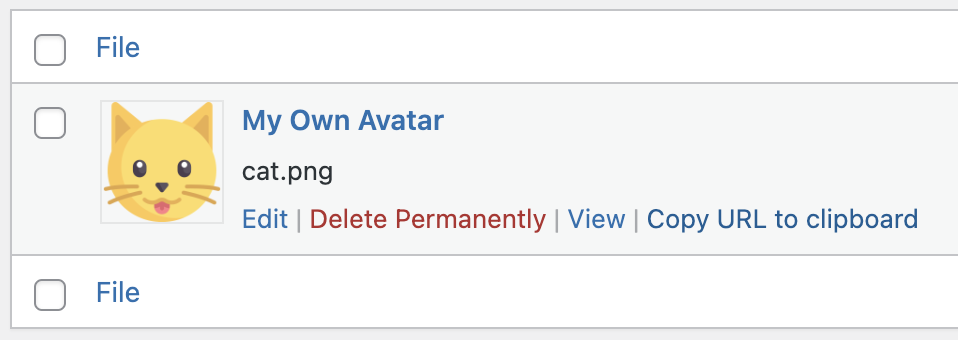
You can get the URL directly from your Media Library by clicking the “Copy URL to clipboard”.
If you keep the user_name empty and an user is connected, it will retrieve the gravatar or the avatar already set in WordPress for this user. Remember that by default, user_name is not empty and set to “User :”.
Displayed Texts
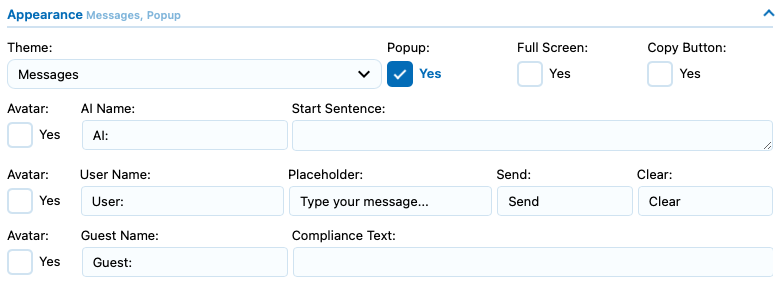
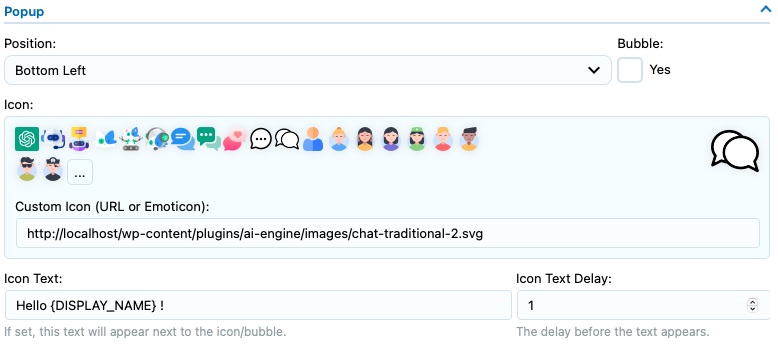
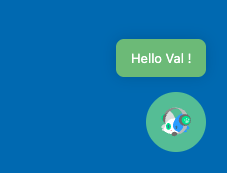
The chatbot displays various text elements inside and around the chat interface: the AI name, the user name, a name for guest users, a compliance text shown below the chatbot, an Icon text above the chatbot when it’s in pop-up mode and a Start Sentence to have a first message in the chat. You can customize all of these values individually in the chatbot settings under the Appearance section.
Settings
Simply change these values in the Appearance settings and check the preview on the right side to see how your modifications look. The Send and Clear settings correspond to the text inside the respective buttons. Depending on your selected theme, this text might not be visible—for example, the Timeless theme uses icons instead of button text.
There are a few placeholders available for you to use in your ai_name parameter. Generally, you would want to use {DISPLAY_NAME}, which is what the user would expect to see.
If you want to change the text that appears above the popup, make sure to go into the Popup settings. You can also change the placeholder text from there if needed.
You can style it by using its class : .mwai-icon-text.
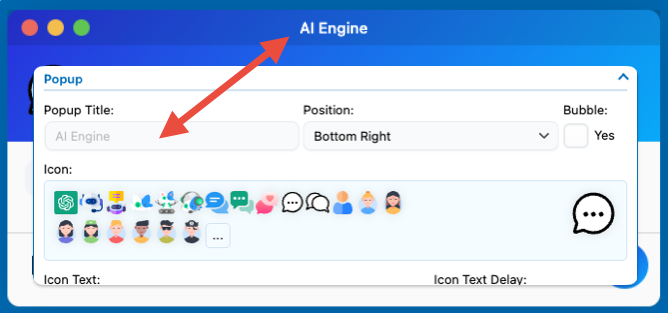
You can use the “UI Builder” to add or modify specific elements of the chatbot window. Some of these elements can use text from your settings; for instance, the Header will use the popup title in the Timeless theme. By default it is “AI Engine”, but you can set it to whatever value you want:
Shortcode
You can change all of these settings through the shortcode as well. Here are an examples. You can refer to the image of the settings above, as the parameter names in the shortcode are the same as those used in the settings, make sure to use snake case for each of them. For instance “Icon Text” will be “icon_text”.
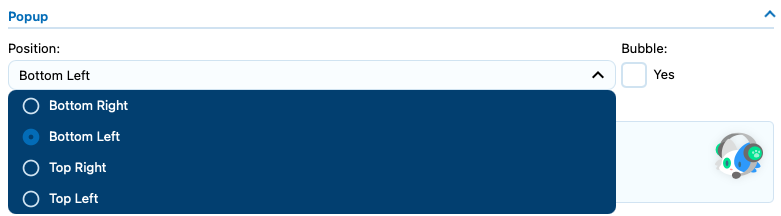
If you haven’t noticed already from the other screenshots, there’s a position setting available in the Popup section.
Settings
Shortcode
[mwai_chat icon_position="bottom-left"]
Custom positioning
If you want to position the chatbot popup in a custom location, you can use custom CSS targeting the .mwai-window class or directly using the chatbot ID. Here’s how:
If you are not using the Default chatbot, make sure the ID is matching the chatbot you are trying to modify.
First, locate the chatbot container by its ID — it will look something like #mwai-chatbot-default ( id=”mwai-chatbot-default” )
Then, apply your desired position using CSS. For example:
This will move the popup to 30px from the top and right.
Advanced Customization
This lists the CSS classes used in the AI Engine chatbot theme structure, organized hierarchically from the outermost container to the innermost elements.
Root Container
.mwai-chatbot (+ theme class)
The root container for the entire chatbot. Combined with a theme class like .mwai-foundation-theme, .mwai-chatgpt-theme, .mwai-timeless-theme, or .mwai-messages-theme.
Modifiers:
.mwai-window — Popup/floating chat window mode
.mwai-fullscreen — Fullscreen mode
.mwai-open — Window is currently open
.mwai-opening — Window is animating open
.mwai-closing — Window is animating closed
.mwai-bubble — Bubble-style trigger icon
.mwai-bottom-left, .mwai-bottom-right, .mwai-top-left, .mwai-top-right — Window position
.mwai-center-open — Center the window when open
.mwai-form-container — AI Forms mode
Window Mode Structure
.mwai-trigger
The clickable icon/button that opens the chat window (only visible when window is closed).
Children:
.mwai-icon-text-container — Container for the optional text bubble
.mwai-icon-text — The text bubble message
.mwai-icon-text-close — Close button for the text bubble
.mwai-icon-container — Container for the trigger icon
.mwai-icon — The actual icon image
.mwai-emoji — Emoji icon alternative
.mwai-window-box
Wrapper for window animation transitions. Contains the header and body.
Header
.mwai-header
The header bar of the chat window (visible in window mode).
Children:
.mwai-name — Chat title/name display
.mwai-buttons — Container for window control buttons
.mwai-resize-button — Fullscreen toggle button
.mwai-close-button — Close window button
.mwai-mobile-header
Mobile-specific header shown when chat is fullscreen on mobile devices.
Children:
.mwai-mobile-header-title — The title text
.mwai-mobile-header-close — Close button
Body
.mwai-body
Main body container holding all chat content. Uses flexbox column layout.