This feature is intended for advanced users only. Please do not attempt to implement it unless you are comfortable developing WordPress plugins. We do not provide direct support for custom implementations of this kind, and this information is provided for reference purposes only.
You can add support for AI service providers that are not supported by AI Engine out of the box. If you want to use a service like Hugging Face or a custom API running locally, you can create a new Environment Type to integrate it.
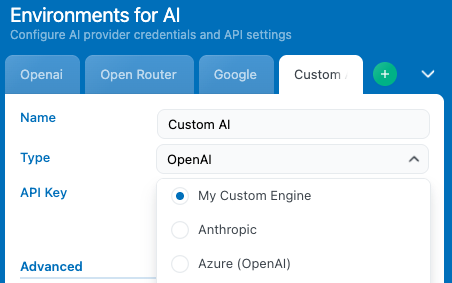
This is the same approach used by the Ollama addon, which introduces its own environment type to connect with locally hosted models. By defining a custom environment, you can configure endpoints, authentication, and model parameters to work seamlessly within AI Engine.
AI Engine allows you to add custom engines through two main filters:
– mwai_engines: Register your engine type
– mwai_init_engine: Initialize your engine class
Register Your Engine
Add your engine to the list of available engines:
add_filter( 'mwai_engines', function( $engines ) {
    $engines[] = [
        'name' => 'My Custom Engine',    // Display name
        'type' => 'my_engine',           // Unique identifier
        'inputs' => [ 'endpoint', 'apiKey', 'dynamicModels' ], // Settings inputs
    ];
    return $engines;
});
Create the Engine Class
Extend the OpenAI engine (most common base) or another engine:
class My_Custom_Engine extends Meow_MWAI_Engines_OpenAI {

    private $endpoint = 'https://api.my-service.com/v1';

    public function __construct( $core, $env ) {
        parent::__construct( $core, $env );
    }

    /**
     * Set up API credentials and endpoint from environment settings
     */
    protected function set_environment() {
        $env = $this->env;

        // Get API key from environment
        $this->apiKey = $env['apiKey'] ?? '';
        if ( empty( $this->apiKey ) ) {
            throw new Exception( 'API key is required.' );
        }

        // Get custom endpoint if provided
        if ( !empty( $env['endpoint'] ) ) {
            $this->endpoint = $env['endpoint'];
        }
    }

    /**
     * Build the API URL for requests
     */
    protected function build_url( $query, $endpoint = null ) {
        $endpoint = apply_filters( 'mwai_my_engine_endpoint',
            trailingslashit( $this->endpoint ) . 'v1',
            $this->env
        );
        return parent::build_url( $query, $endpoint );
    }

    /**
     * Customize request headers
     */
    protected function build_headers( $query ) {
        $headers = array(
            'Content-Type' => 'application/json',
            'Authorization' => 'Bearer ' . $this->apiKey,
            'User-Agent' => 'AI Engine',
        );
        return apply_filters( 'mwai_my_engine_headers', $headers, $query );
    }

    /**
     * Customize request body
     */
    protected function build_body( $query, $streamCallback = null, $extra = null ) {
        $body = parent::build_body( $query, $streamCallback, $extra );

        // Example: Rename a parameter for API compatibility
        if ( isset( $body['max_completion_tokens'] ) ) {
            $body['max_tokens'] = $body['max_completion_tokens'];
            unset( $body['max_completion_tokens'] );
        }

        return $body;
    }

    /**
     * Return service name for logging
     */
    protected function get_service_name() {
        return "My Custom Engine";
    }

    /**
     * Get models from AI Engine's model cache
     */
    public function get_models() {
        return $this->core->get_engine_models( 'my_engine' );
    }

    /**
     * Fetch available models from remote API
     * Called when user clicks "Refresh Models"
     */
    public function retrieve_models() {
        $url = trailingslashit( $this->endpoint ) . 'models';

        $response = wp_remote_get( $url, [
            'headers' => $this->build_headers( null )
        ]);

        if ( is_wp_error( $response ) ) {
            throw new Exception( 'Failed to retrieve models: ' . $response->get_error_message() );
        }

        $body = json_decode( $response['body'], true );
        $models = [];

        foreach ( $body['data'] ?? [] as $model ) {
            $models[] = [
                'model' => $model['id'],
                'name' => $model['id'],
                'family' => 'custom',
                'features' => ['completion'],
                'price' => [
                    'in' => 0.001,   // Price per 1K input tokens
                    'out' => 0.002,  // Price per 1K output tokens
                ],
                'type' => 'token',
                'unit' => 1 / 1000,
                'maxCompletionTokens' => 4096,
                'maxContextualTokens' => 8096,
                'tags' => [ 'core', 'chat' ] // Options: core, chat, vision, functions, embedding
            ];
        }

        return $models;
    }

    /**
     * Handle token usage tracking
     */
    public function handle_tokens_usage( $reply, $query, $returned_model,
        $returned_in_tokens, $returned_out_tokens, $returned_price = null ) {

        $returned_in_tokens = $returned_in_tokens ?? $reply->get_in_tokens( $query );
        $returned_out_tokens = $returned_out_tokens ?? $reply->get_out_tokens();

        $usage = $this->core->record_tokens_usage(
            $returned_model,
            $returned_in_tokens,
            $returned_out_tokens,
            $returned_price
        );

        $reply->set_usage( $usage );
    }

    /**
     * Calculate price for a query
     */
    public function get_price( Meow_MWAI_Query_Base $query, Meow_MWAI_Reply $reply ) {
        // Return 0 for free/local models, or calculate based on tokens
        return 0;
    }
}
Initialize the Engine
Hook into mwai_init_engine to instantiate your engine:
add_filter( 'mwai_init_engine', function( $engine, $core, $env ) {
    if ( $env['type'] === 'my_engine' ) {
        $engine = new My_Custom_Engine( $core, $env );
    }
    return $engine;
}, 10, 3 );
Example
class My_Custom_Engine_Core {
  public function __construct() {
    add_action( 'plugins_loaded', array( $this, 'plugins_loaded' ) );
  }

  function plugins_loaded() {
    // Only for REST
    if ( $this->is_rest ) {
      new My_Custom_Engine_Rest( $this );
    }

    // Filters
    add_filter( 'mwai_engines', function( $engines ) {
        $engines[] = [
            'name' => 'My Custom Engine',
            'type' => 'my_engine',
            'inputs' => [ 'apiKey', 'endpoint', 'dynamicModels' ],
        ];
        return $engines;
    });

    // Initialize the engine when requested
    add_filter( 'mwai_init_engine', function( $engine, $core, $env ) {
        if ( $env['type'] === 'my_engine' ) {
            require_once __DIR__ . '/class-my-engine.php';
            $engine = new My_Custom_Engine( $core, $env );
        }
        return $engine;
    }, 10, 3 );
  }
}