Make sure to read the WordPress MCP Server to set up your environment in AI Engine before starting here.
Using AI Engine MCP with Claude Code is one of the easiest ways to set up and use your WordPress server as an MCP server.
First, make sure you’ve updated your Claude Code client to the latest available version before proceeding.
❯ sudo claude update
Password:
Current version: 1.0.56
Checking for updates...
New version available: 2.1.19 (current: 1.0.56)
Installing update...
Using global installation update method...
Successfully updated from 1.0.56 to version 2.1.19

~ 19s
Once that’s done, simply copy and paste one of the commands from the “How to Use” section in the MCP Server settings.
The only difference between the command options is the authentication method. In this example, we’ll use the URL-based authentication.
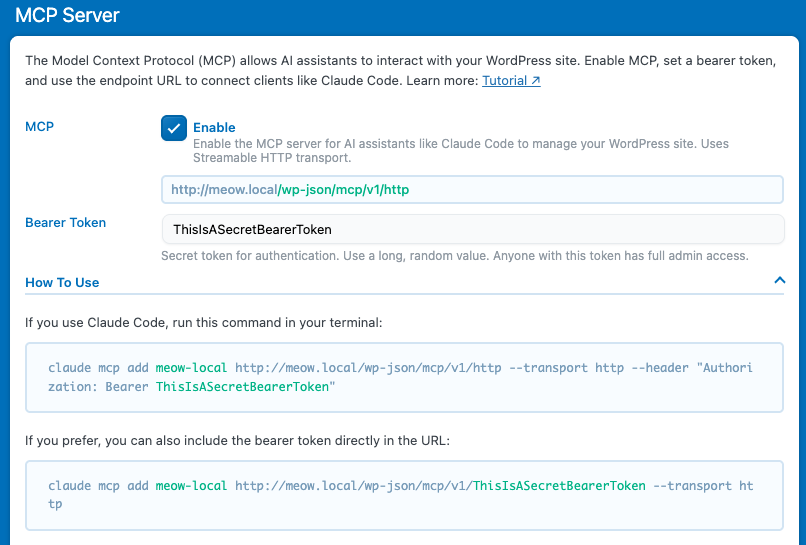
Heads up: in this example, everything is running locally on a test server, so it uses HTTP instead of HTTPS. In your case, make sure to use HTTPS for a secure connection.
You should see in your console:
❯ claude mcp add meow-local http://meow.local/wp-json/mcp/v1/ThisIsASecretBearerToken --transport http
Added HTTP MCP server meow-local with URL: http://meow.local/wp-json/mcp/v1/ThisIsASecretBearerToken to local config
File modified: /Users/user/.claude.json [project: /Users/user]
And you are done! 🎉
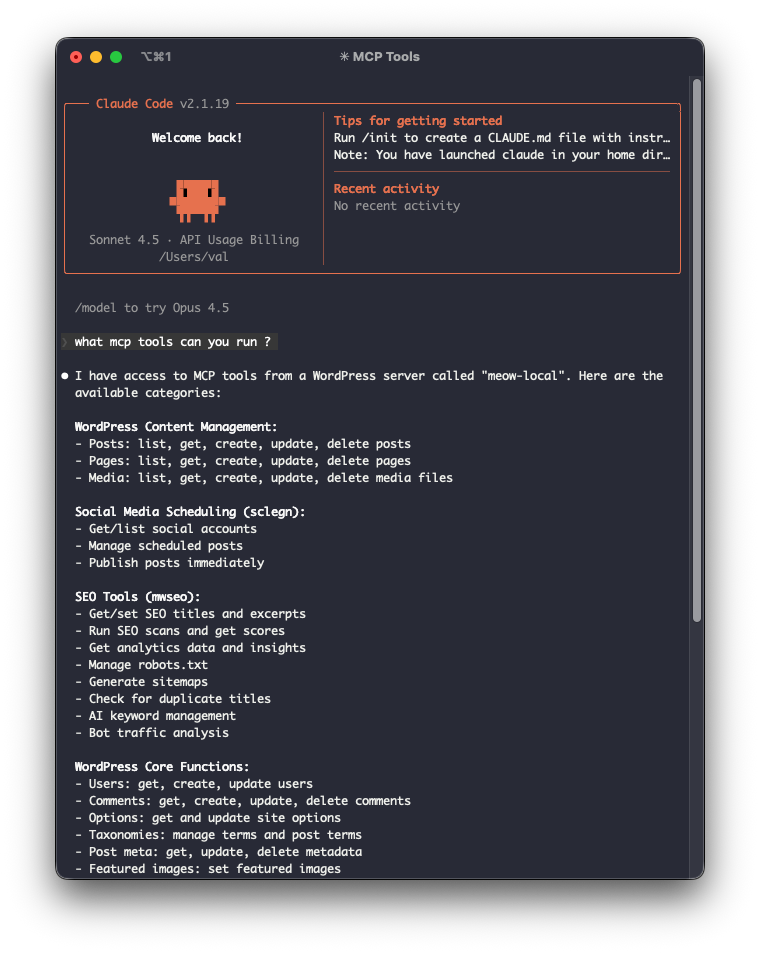
Then you can use Claude Code as usual, but now you’ll have access to all the tools exposed by your WordPress server through AI Engine.
In the example below, both the Social Engine and SEO Engine plugins are installed, so their respective tools are also available directly within Claude Code.