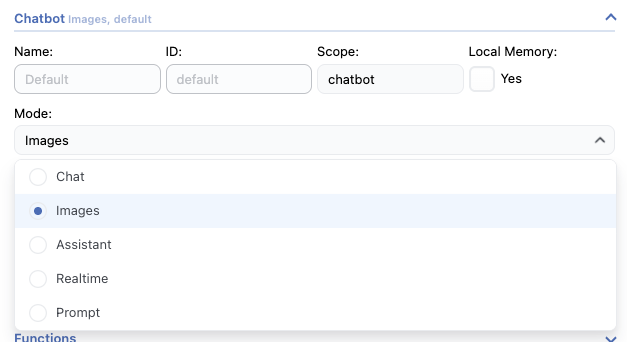
Chatbot
You can choose to set your chatbot to “image” mode and it will generate images for each message you send.
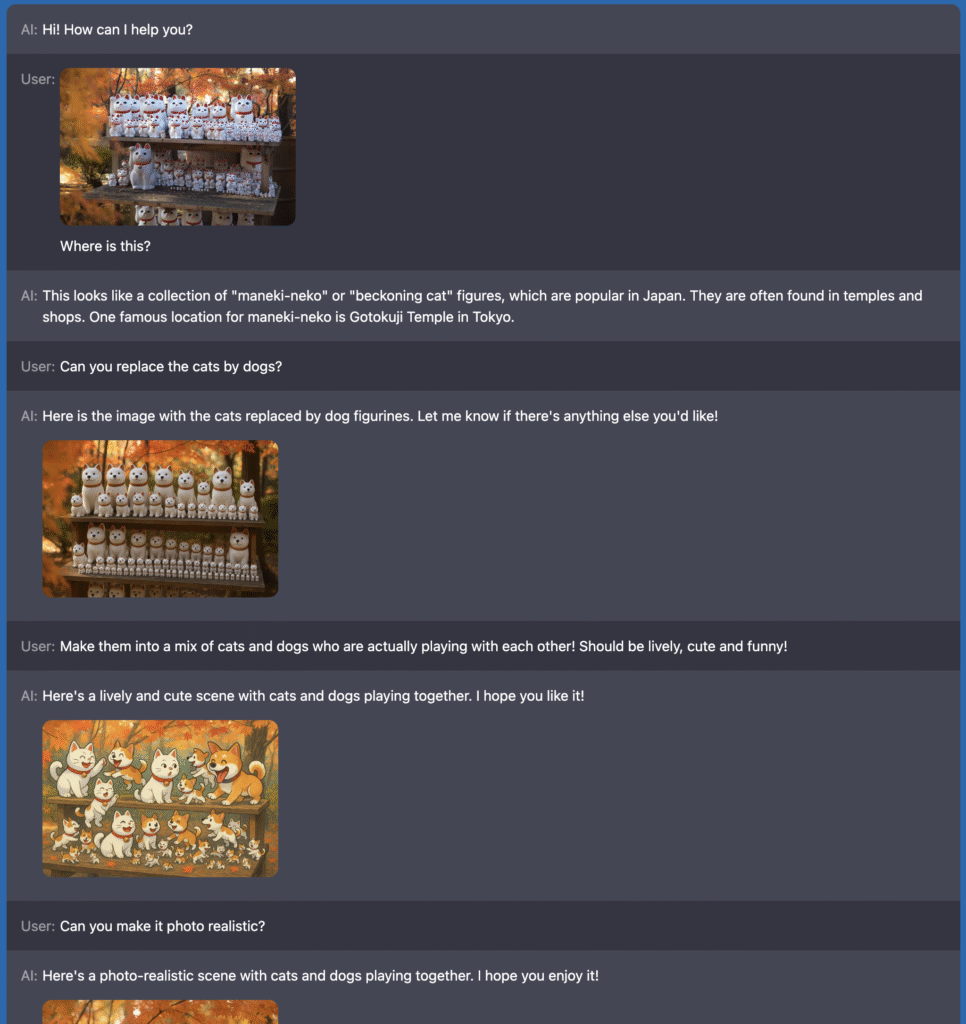
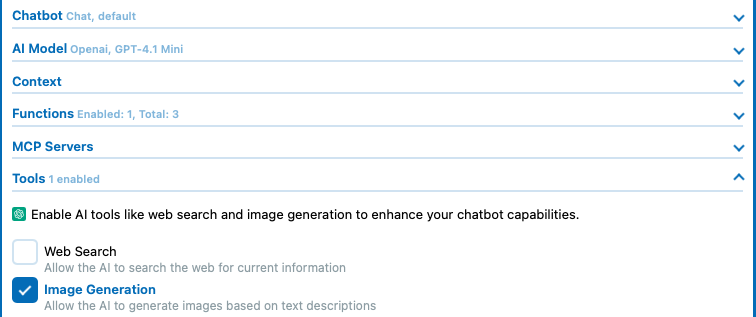
If you want your chatbot to work with text responses and generate images only when asked, the recommended method is to use the Chat Mode with Image Generation tool, compatible with most recent models.
If your model is compatible, you can simply select it and it will be used automatically, just like function calling. This approach runs entirely on OpenAI’s side ( or Google / Anthropic ), so you won’t have any control over it, there are no settings to customize or tweak the results. However, it’s a free and straightforward solution.
If you are using a model that cannot run the out-of-the-box Image Generation tool, you can also use function calling to let the chatbot generate the image by itself by creating your own logic.
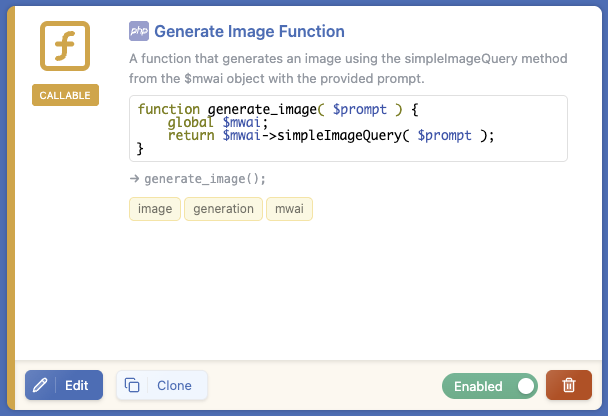
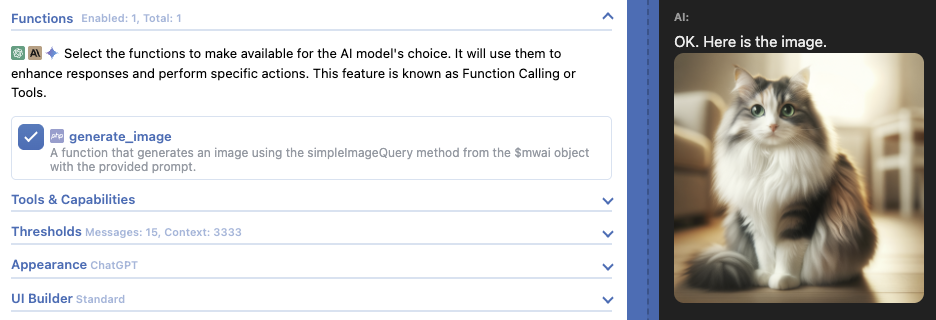
Yes, it is really just two lines of code, and now any chatbot can generate images:
function generate_image( $prompt ) {
    global $mwai;
    return $mwai->simpleImageQuery( $prompt );
}
AI Forms
If you need to tailor your users’ prompts with predefined choices, using AI Forms might be the best solution. You can learn everything about them in this documentation: Your First Form.
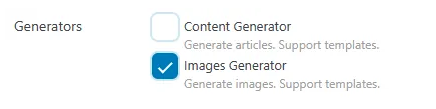
To generate Images with forms you just need to select a model that generates images instead of a regular text-based model:
You can try it yourself below: the prompt is already predefined; it should generate something that looks familiar…
Dashboard
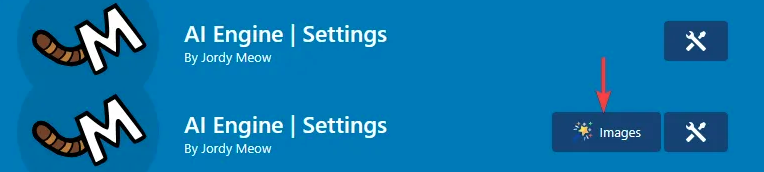
First, in the AI Engine dashboard, make sure to enable the Images Generator feature.
This will add a new button that will bring you to the image generation dashboard in the top right corner of the AI Engine dashboard.
Once on the Images Generator, different settings will be available:
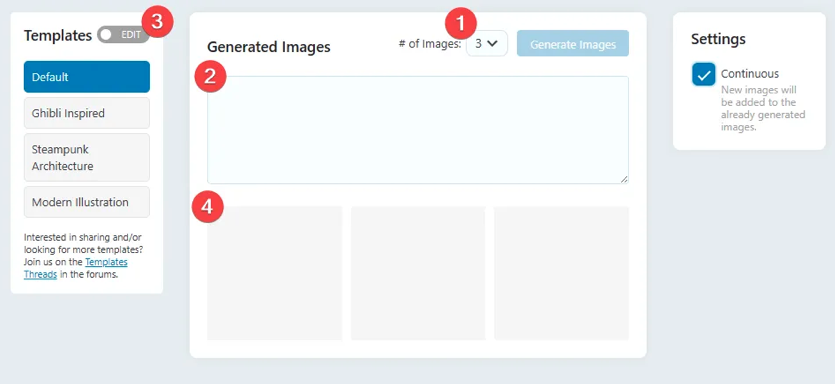
1. Number of images: You have the option to generate images in batches. You can also use the Continuous option to add the previously generated images to the current ones.
2. Prompt input: Describe the image you wish to generate.
3. Templates: When you have entered some prompts you don’t want to lose, you can save them and reuse them later as templates. Switch to edit mode to update/add new ones. You already have some ready for you.
4. Images: Once generated, the images will be displayed at the bottom of the page, under the prompt area.
Image Edits
For models that are compatible (right now only the OpenAI GPT Image 1), you can also do image editing. To do this, go to your media library, select an image, and use the “Edit” menu (with the magic wand icon). This will open the image in the AI Engine Image Editor tool.
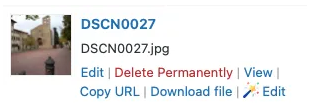
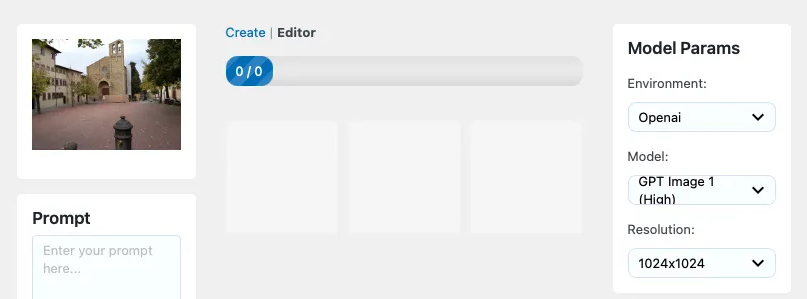
Image Edits In Chatbot
You can also enable image editing behavior within a discussion thread by taking advantage of OpenAI Tools. If you’re using a vision-enabled model, you can create a workflow where the model first visualizes the image, generates a description of it, and then uses your prompt along with that description to generate a new image that appears as an edit of the original.